

Easy Odoo v10 Installation Steps For Ubuntu

 by bista-admin
- Oct 20, 2016
- 0
- Category: Download 10 Version of Odoo for Windows, Download 10 Version of Open source ERP software Odoo, Odoo 10
Using a VM (Virtual Machine) gives you your own Odoo Server!
You can use this method to create a VM for Odoo 9, and Odoo 10, as well as VM’s for each client project you have to support. Start and stop each VM as you need it. You can connect to the VM while you are in the office, at home, on a plane or in your hotel – no network connection is needed after you have installed Odoo!
This example works on Windows 10 with Virtual Box at or higher than 5.1.4. Plan for 2-3 hours of time. There are many resources on the web to help with the installation of Virtual Box – We list only the main steps here.
Steps:
Download an Ubuntu Server ISO (install CD file) from
http://www.ubuntu.com/download/server Make sure you use an LTS version, I am using 16.04.1 LTS.
Install Oracle Virtual Box from
https://www.virtualbox.org/wiki/Downloads
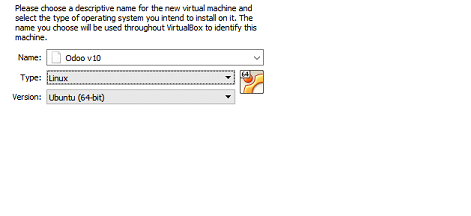
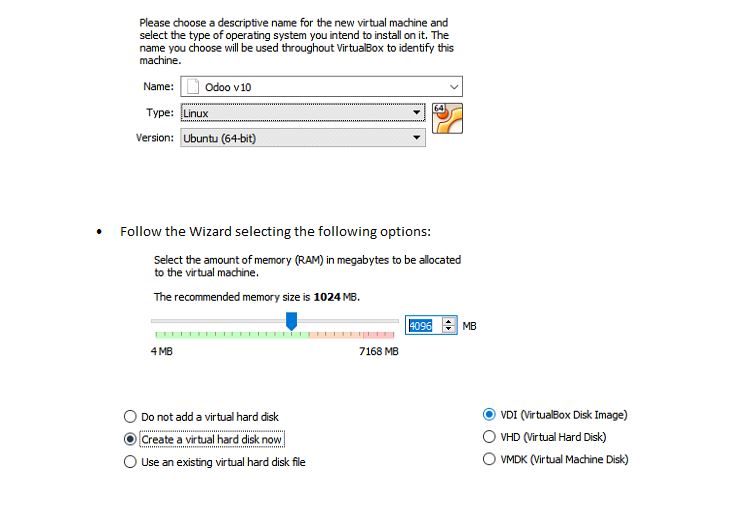
Open Virtual Box and create a new VM. You should use no more than half the memory of your laptop when sizing it. Here is the first screenshot of the Wizard for creating a NEW VM:
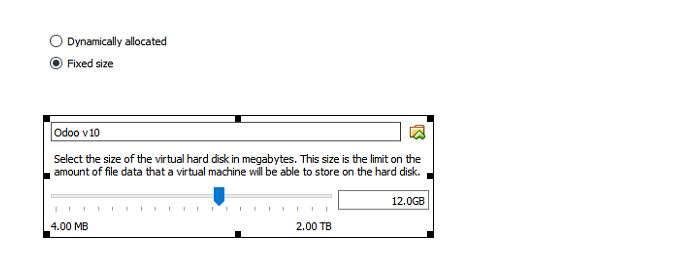
Follow the Wizard selecting the following options:
Now wait, the creation takes a few minutes
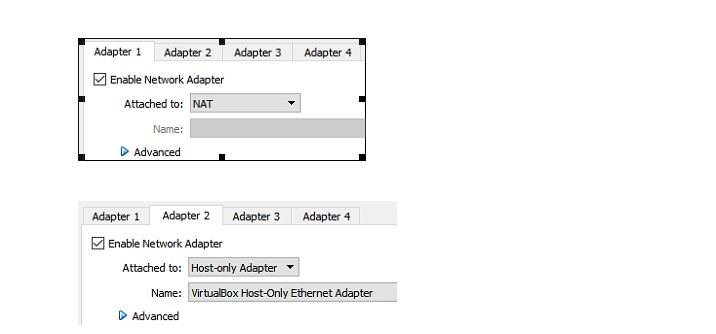
Right click on the VM and select Settings. The first settings we need to change are Network:
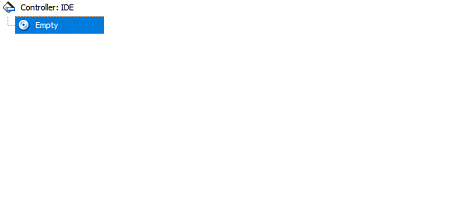
The next are Storage, to point the VM to the ISO of Ubuntu you downloaded. Click on EMPTY
![]()
Click the CD/DVD Icon and Choose Virtual Optical Disk File – point to the ISO you downloaded
![]()
Start your VM!
You will now install Ubuntu. Hit ENTER a few times (to take all the defaults) until you get to CONFIGURE THE KEYBOARD. Select YES (you use TAB to select options in the VM console) and then you will have to press several keys to detect your keyboard.
Keep hitting ENTER or CONTINUE to take all the defaults until you get to SETUP USERS AND PASSWORDS and choose odoo for the name of the new user, odoo for the username and odoo for the password.
Keep hitting ENTER to take all the defaults until you get to PARTITION DISKS, selecting YES. Click ENTER for the defaults until you get to PARITION DISKS again (write the changes to disks) and select YES. Keep hitting ENTER or CONTINUE to take all the defaults.
Wait until the system is installed. Leave HTTP proxy information blank on CONFIGURE THE PACKAGE MANAGER.
When you get to the SOFTWARE SELECTION screen, make sure POSTGRESQL DATABASE is checked.
Once Ubuntu is installed, login as odoo/odoo and make a small change to support networking so your server can be reached from any network or no network:
sudo nano /etc/network/interfaces
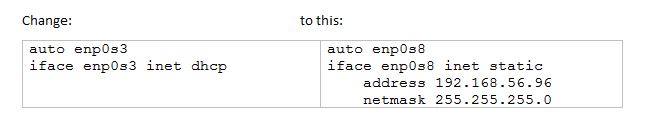
CTRL-O saves, CTRL-X exists the nano editor
Reboot:
sudo reboot now
Login again (odoo/odoo) and now let’s install Odoo:
1. Clone out the Odoo v10 branch through the following command inside /opt folder
cd /opt
sudo git clone https://github.com/odoo/odoo.git –branch 10.0 –single-branch
2. After downloading of source you need to install the dependent libraries
• Now simple issue a command to install all the dependent libraries from
requirement.txt file
• To install from requirement.txt file (requirement.txt is a file having all the
dependent library names)
Command lists:-
sudo pip install -r [/requirement.txt]
3. Install nodejs and npm
sudo apt-get install nodejs
sudo ln -s /usr/bin/nodejs /usr/bin/node
sudo npm install -g less
4. Install wkhtmltopdf library, to print report in PDF format:-
• Below is the command to download the wkhtmltopdf library,
sudo wget http://download.gna.org/wkhtmltopdf/0.12/0.12.1/wkhtmltox-0.12.1_linuxtrusty-
amd64.deb
• Then, follow it up by the installation command:-
sudo dpkg -i wkhtmltox-0.12.1_linux-trusty-amd64.deb
5. You need to now setup the Postgresql DB for Odoo
• Install Postgresql Database with the following command:
sudo aptitude install postgresql-9.5
• Create a user role in database by firing the below command in ubuntu
su – postgres -c “createuser -s odoo”
6. Create an Odoo Configuration File
nano /etc/odoo/odoo.conf
[options]
db_host = False
db_port = False
addons_path = /opt/enterprise,/opt/odoo/addons
7. Your configuration is complete, run this command to start the odoo service:
./odoo-bin -c /etc/odoo/odoo.conf
ALL SET TO START WITH YOUR ODOO…!!
Get started with Odoo 10 as quick as this !!!
We hope this Odoo 10 installation guide helps you through your installation process.Stay tunned at www.bistasolutions.com for more details Odoo10 new features.
Feel free to get in touch with us for any assistance on Odoo10 installations or for Odoo10 training at sales@bistasolutions.com or write to us at feedback@bistasolutions.com


