

Odoo QuickBooks Integration

 by bista-admin
- Aug 18, 2021
- 0
- Category: Odoo Integration
Odoo QuickBooks Integration
Odoo QuickBooks integration is used to import/export bills, invoices, vendors, customers, etc. from Odoo. QuickBooks is an accounting software, generally used by companies for accounting purposes only, while Odoo is a web-based ERP system through which you can manage all business processes from anywhere, You get real-time reports and data which allows you to make better forecasting decisions.
Odoo QuickBooks Configuration:
- To Import/Export data from Odoo to QuickBooks or vice-versa, one needs to configure the credentials of QuickBooks in Odoo.
- Login to your QuickBooks account and select the Keys & Oauth option as shown in Figure 1.1.
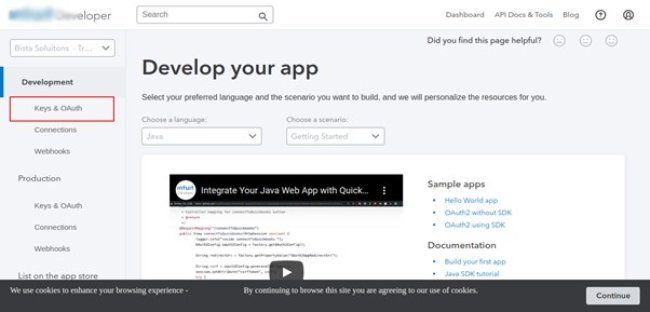
Figure 1.1
- After this, you will see the client ID and Client Secret Key will be displayed.
- Save those credentials and below you can see the Redirect URL.
- That is when credentials are authenticated and data is transferred from anywhere, one needs to apply the URL, where the data needs to be transferred for that particular process.
- This data is shown in Figure 1.3.

Figure 1.3
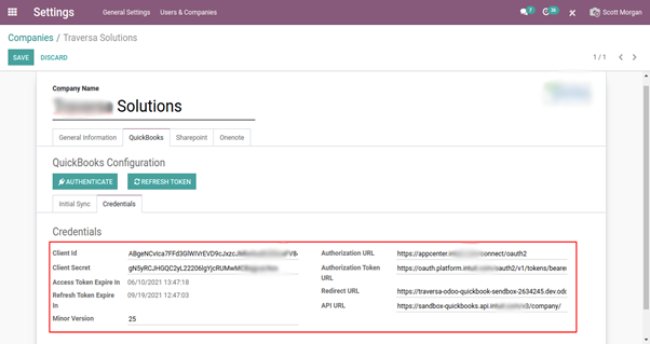
Figure 1.4
- In Figure 1.4, the credentials have been configured in Odoo and also the redirect URLs have also been assigned.
- Hence, Click on the AUTHENTICATE button and you will be redirected to a new window if all works fine there will be a message displayed as shown in Figure 1.5.
- You can close the window and proceed further in the Odoo QuickBooks Integration connector.

Figure 1.5
QuickBooks Invoice Functional Process:
- Once the sale order is confirmed, there are tasks generated as shown in Figure 2.1.
- When you open and click them you can see the list of tasks generated as shown in Figure 2.2.
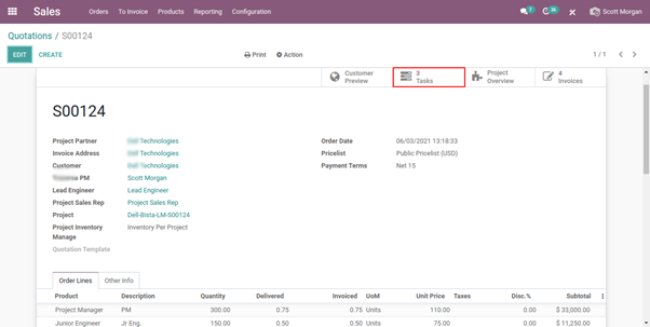
Figure 2.1
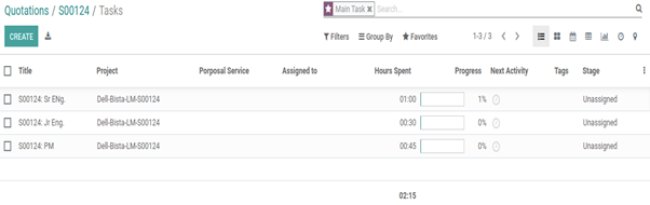
Figure 2.2
- Now, an employee(Scott Morgan) will fill the timesheet and add a description about it so that it invoice will be created for that amount. of work done.
- Click on the START button and when work is done click on the STOP button.
- Enter the duration of time and description.
- This is shown in Figure 2.3 & 2.4.
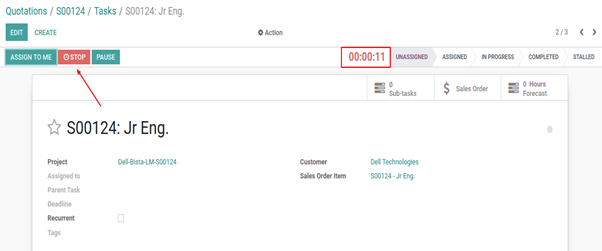
Figure 2.3
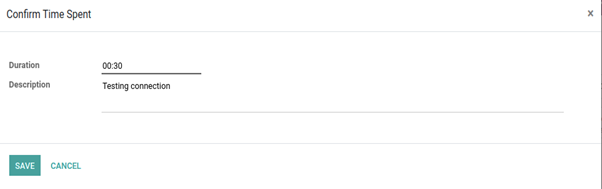
Figure 2.4
- You can see the timesheet entry has been created.
- If a new entry will be created, you can see in Figure 2.5, the invoiced one will be fainted.
- This will tell the user which entries need to be invoiced.

Figure 2.5
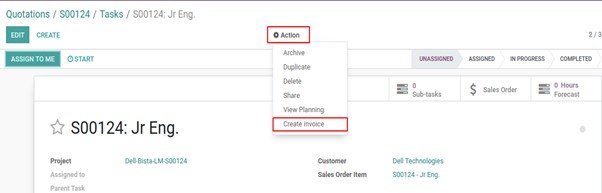
Figure 2.6
- You can proceed to create an invoice as shown in Figure 2.6.
- Users can create invoices based on the period ‘from’ till ‘to’ as shown in Figure 2.7.
- Click on the CREATE AND VIEW INVOICE button and you can see the invoice has been created.
- This is shown in Figure 2.7 & 2.8
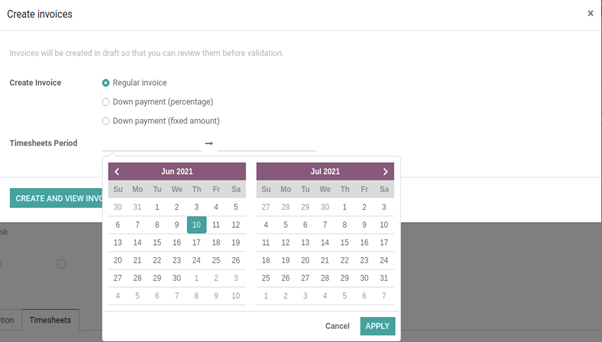
Figure 2.8
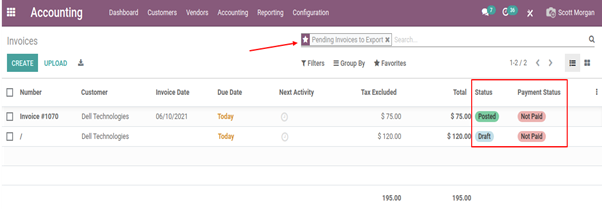
Figure 2.8
- Now, the Accounting Manager will get an Email for the invoice generated.
- Hence He/She will log in to her account and Confirm the invoice that has been generated.
- Access rights have been given to each and every user based on their roles. If the box is ticked it means that rights have been given to that particular user. This is shown in Figure 2.9.
- e.g, here Project manager will not have any right to export customers, invoices, etc to QuickBooks. The option to Export data will not be visible to them.
- Hence only the Account Manager will confirm the invoice and export data to QuickBook.
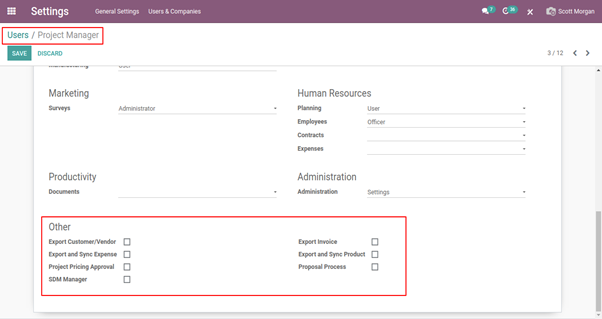
Figure 2.9
- Hence when the Account manager logs in, He/She will go to the Accounting module—> Invoices. There one can set the filter of Invoices that are needed to be Posted or Confirmed as one can see in Figure 2.8
- Only invoices that are posted can be exported to QuickBooks via Odoo QuickBooks integration. Hence one needs to Confirm the Invoice and Post it.
- Hence the invoice will be confirmed by clicking the CONFIRM button as shown in Figure 3.1.
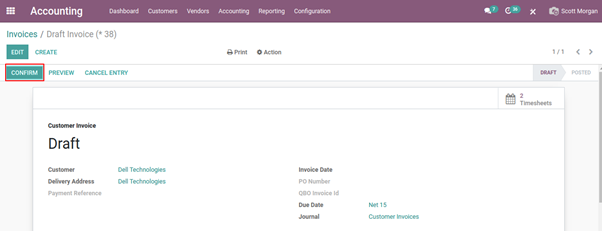
Figure 3.1
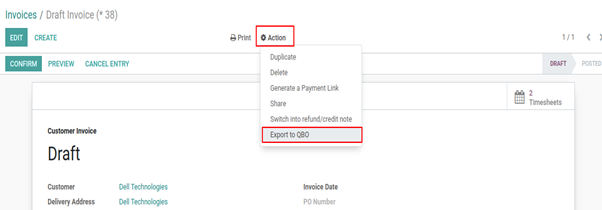
Figure 3.2
- Once the Invoice is confirmed, click on the Action button and select Export to QBO
- If there is no error and all credentials are configured, then you will be able to see an ID is generated as QBO Invoice Id.
- This is shown in Figure 3.3

Figure 3.3
- One can export multiple Invoices to QuickBooks by selecting all records from the tree view and selecting the Export to QBO option from Action
- Note that the status should be POSTED.
- This is shown in Figure 3.4.
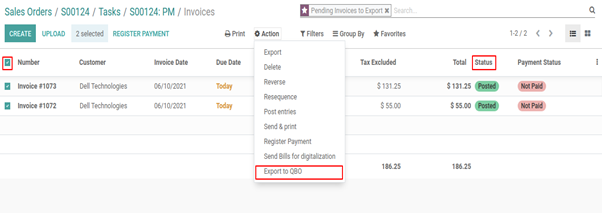
Figure 3.4
- Now the manager can go to QuickBooks and check whether the entry of that particular invoice is created or not.
- Hence as shown in Figure 3.5, click on Sales—>Invoices.
- Hence you can see that the entry of our invoice has been created. Here it will be Traced by Id, i.e in our case it is
- This is shown in Figure 3.5.
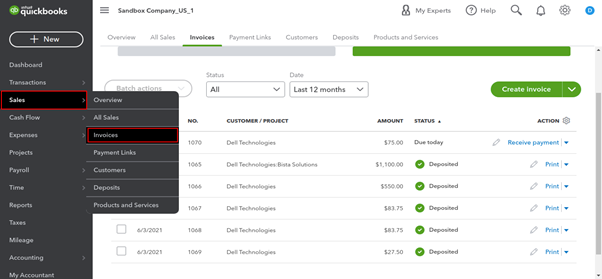
Figure 3.5
- Now to receive the payment, click on the Receive payment
- Hence as shown in Figure 3.6, you can send an invoice to the customer or to the project.
- Once you enter the details and click on save & new, the message of payment received will be displayed as shown in Figure 3.7.
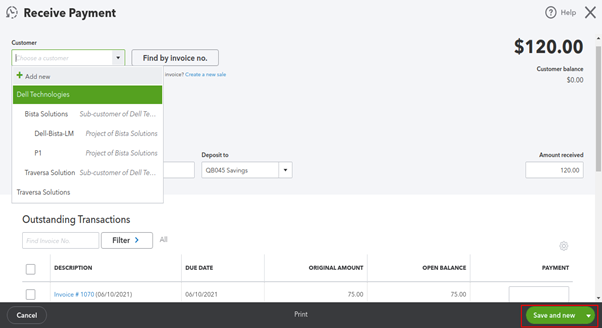
Figure 3.6
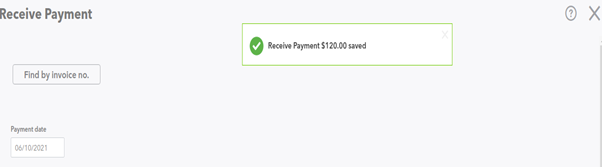
Figure 3.7
You can see the state has been changed to Deposited, and you can print the invoice. This is shown in Figure 3.9. 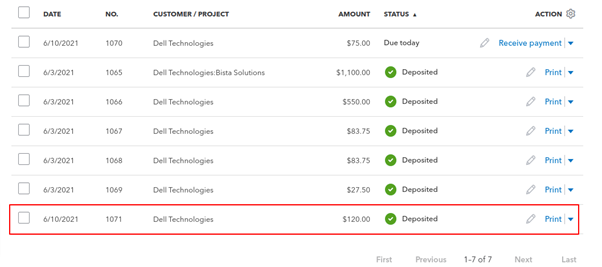
Figure 3.9
- Now in Odoo, the Automatic scheduler will run that will fetch/Sync the payment data.
- One can sync manually from odoo
- By Going to the company and selecting the SYNC CUSTOMER PAYMENT button, the data will sync automatically.
- Note: this button is only visible to the Account Manager since access rights will be provided to him/her.
- This is shown in Figure 3.10.
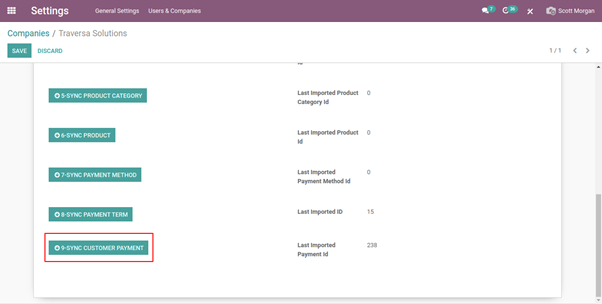
Figure 3.10
- Now the manager will go to Accounting—>Customers—>Payments to check with the invoice that needs to be reconciled.
- This is shown in Figure 4.1 & 4.2.

Figure 4.1

Figure 4.2
- One can trace the invoice by looking at the Memo & QBO Payment Id.
- Now click on the Payment Matching smart button.
- This is shown in Figure 4.3.

Figure 4.3
- Now select the invoice amount that needs to be reconciled.
- Then click on the RECONCILE
- This is shown in Figure 4.4 & 4.5.

Figure 4.4

Figure 4.5
- Once the record is reconciled, the invoice is in payment status, i.e. it’s been paid.
- One can see the smart button of Invoice is created. By clicking it that invoice will be opened and the state will be in Payment.
- Another option to see invoices is by clicking Customers—> Invoices.
- These steps are shown in Figure 4.6 & 4.7.
- Also, you can track payment ref. and invoice id.

Figure 4.6

Figure 4.7
Expense Process From QuickBooks to Odoo ( Odoo QuickBooks integration):
- Now to import data from QuickBooks, the expense is created in QuickBooks.
- Go to QuickBooks and select
- Select the Project for which the expense is to be created.
- Now click on the Add to Project button and select Expense
- This is shown in Figure 5.1 & 5.2.
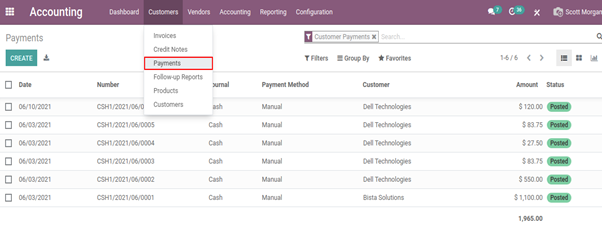
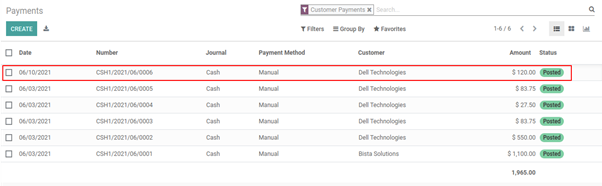
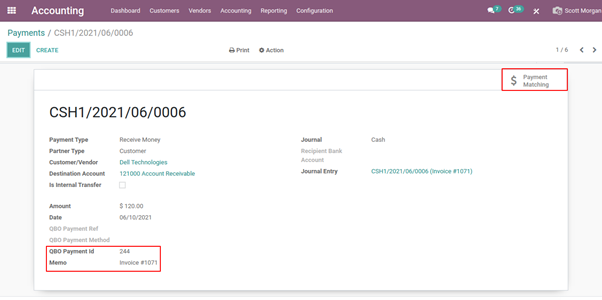
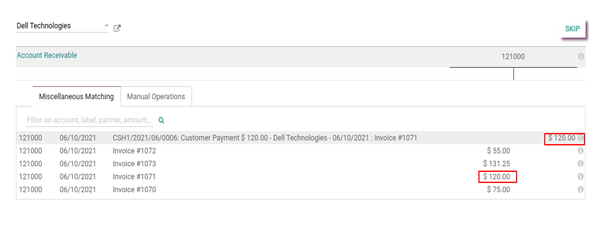
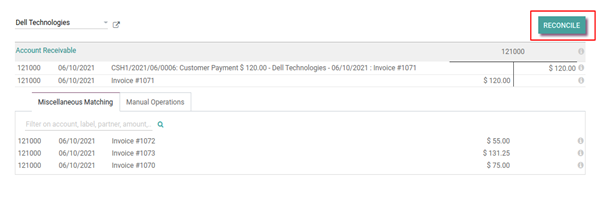
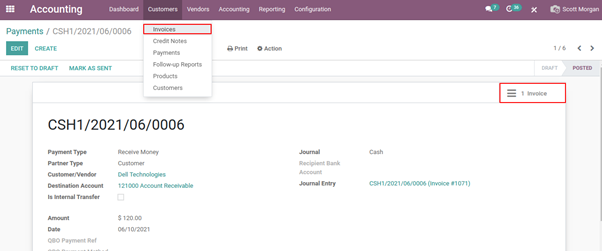
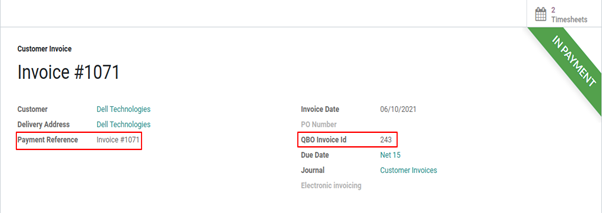
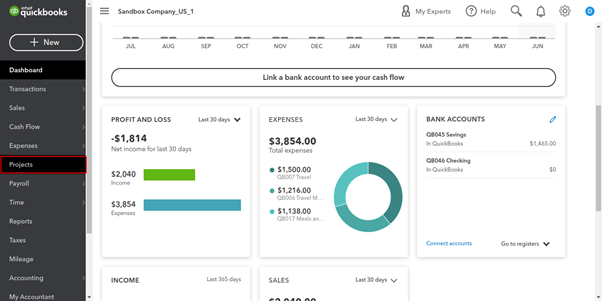
Figure 5.1
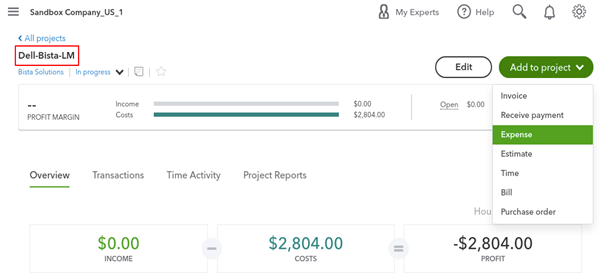
Figure 5.2
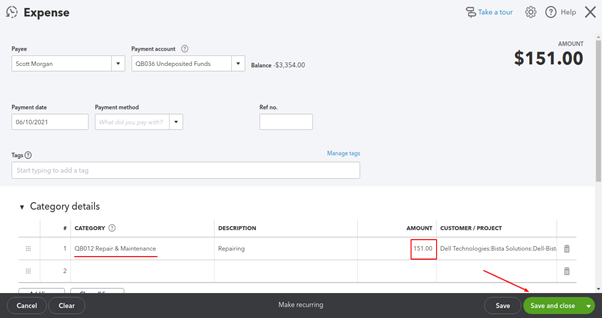
Figure 5.3
- In Figure 5.3, after adding the Payee name, category of expense and the amount, click on the Save and Close button.
- Hence you will see a message of expense has been created with the amount mentioned in it.
- This is shown in Figure 5.4.
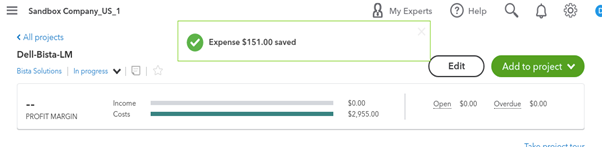
Figure 5.4
- Now, since the expense is created in QuickBooks, we need to import that expense in odoo.
- This is done automatically by the cron job action in odoo based on the duration set in the action.
- One can also do it manually as did for the invoice.
- Before doing it, one can actually see the data that is imported/exported to QuickBooks or vice-versa by adding a default group called Expense type.
- This is shown in Figure 5.5.
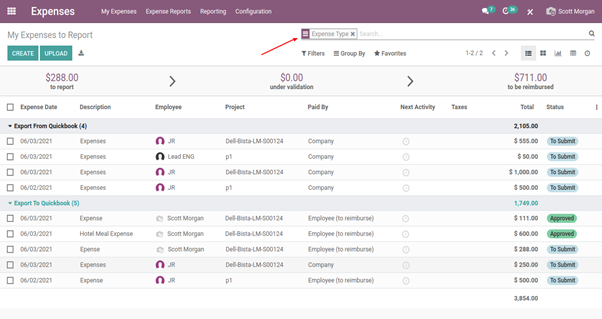
Figure 5.5
- Now, by going to the company, click on the 1-SYNC EXPENSE button, hence that expense will be imported in odoo.
- This step is shown in Figure 5.7.

Figure 5.7
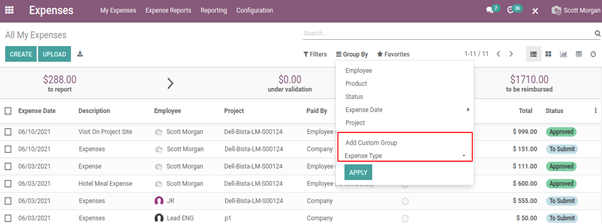
- Now to check the data entry of expenses, go to Expense—> My expenses—> All my Expenses and set Group by as Expense type.
- Hence you can see the entry of that amount and data Export from QuickBooks has been created.
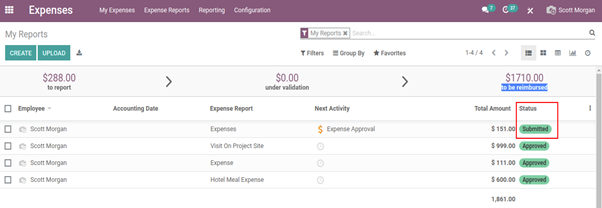
- Now the Manager will log in and go to My Reports options in My Expenses where the amount to be reported, reimbursed, etc details will be listed along with the expenses needed to be approved.
- The state will be submitted hence after approval it will be in the approved state.
- Note: this approval will only be done by the Account Manager based on the Access Right rules set.
- This is shown in Figure 5.8 & 5.9

Figure 5.8

Figure 5.9
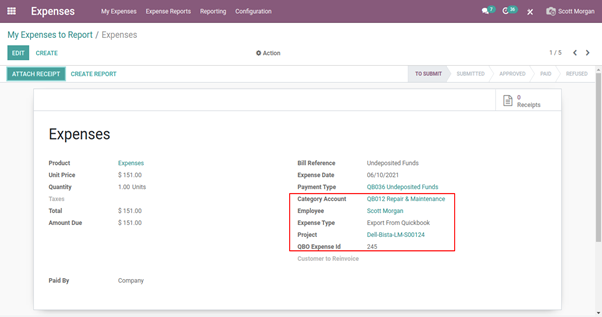
- Now the employee needs to create a report so that the Account Manager can approve the expense.
- One can track the expense by the details captured from QuickBooks as shown in Figure 5.10.
- Hence click on the CREATE REPORT
- Now the report has been created and the manager will approve it.

Figure 5.10
- Now the Manager will log in and go to My Reports options in My Expenses where the amount to be reported, reimbursed, etc details will be listed along with the expenses needed to be approved.
- The state will be submitted hence after approval it will be in the approved state.
- Note: this approval will only be done by the Account Manager based on the Access Right rules set.
- This is shown in Figure A.

Figure A
- Once approved by clicking the APPROVE button the expense is approved.
Expense Process from Odoo to QuickBooks:
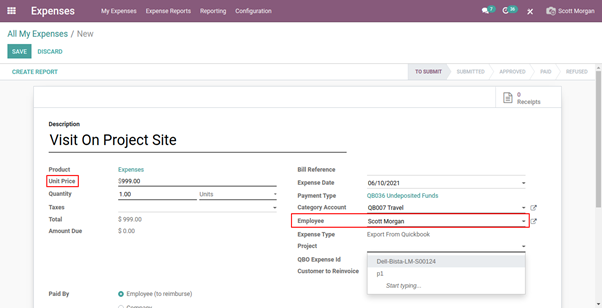
- Now, one needs to export expenses from Odoo to QuickBooks, which creates a new expense and fills the category type, amount of the project to which one wants to add the expense, etc.
- Here the employee who has logged in, while creating a new expense, automatically his name will be displayed in the Employee field name. One can change it.
- This is shown in Figure 6.1.

Figure 6.1
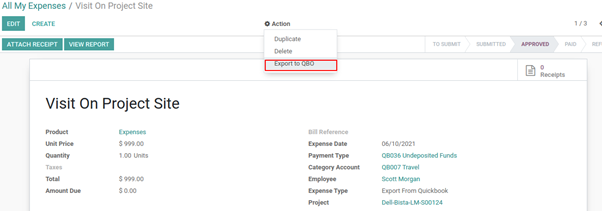
- Here once the expense is created and a report is generated by the employee, a similar process will follow for the Account Manager to get it Approved.
- Hence, He/She will approve the expense.
- Once approved, the manager will export this expense to Quickbook by clicking on the Action button and then clicking Export to QBO.
- This is shown in Figure 6.2 & 6.3

Figure 6.1

Figure 6.3
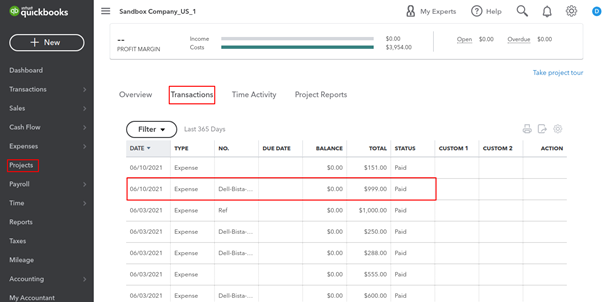
- To check the expense entry in QuickBooks, go to your account, select the Projects
- Select the project at which the expense was created in Odoo.4
- Click on the Transactions
- Hence, you can see our expense entry has been created
- You can open it and check the data entry of the same.
- This is shown in Figure 6.4


If you looking for an Odoo QuickBooks integration, contact us.


