

Odoo SharePoint Integration

 by bista-admin
- May 18, 2021
- 0
- Category: Odoo Integration
Odoo SharePoint Integration
Table of content
[su_table]
| Name |
| 1) SharePoint Process Flow |
| 2) Calendar Sync Process Flow |
| 3) OneNote Process Flow |
[/su_table]
Features:
There is flow from configuring the OneNote and SharePoint in odoo to planning the project that redirects to both of the above portals.
1) Odoo SharePoint Integration Configuration:
- To create the project in SharePoint via odoo, you need to configure the SharePoint in odoo via Odoo Sharepoint integration.
- By applying the correct credentials and secret key, one can be redirected to SharePoint.
- You need to mention the folder name i.e the directory name to store all the data in that particular folder.
- This configuration is required to link the odoo data to SharePoint so that one can keep track of their project, data, etc.
- You need to have a Microsoft 365 account created so that you can access SharePoint, OneNote, Calendar, etc so that the data that is synced with the odoo is up to date and becomes easily accessible.
2) Calendar Sync:
- Calendar sync helps to get reminders of some important events, meetings, or work to do.
- Once the record is created in odoo, it gets automatically synced with the office calendar
3) OneNote Configuration:
- Once the Project is created in SharePoint, the data inside it has a lot of sub-data and information.
- Hence OneNote is used to create the Pages inside the Project created with an attachment in it or the data that is required.
- The configuration process of OneNote is the same as SharePoint i.e providing appropriate credentials to login and sync the data from odoo.
- The Page title is created as per the Customer selected while planning the project. This part will be enlightened in the further process flow.
4) SharePoint Process Flow:
- Once the configuration is completed for SharePoint, and after authenticating the key, You need to proceed with the Lead creation and quotation process.
- Once the Quotation is created and the project is planned, You can click the SharePoint Button to redirect to the Sharepoint Portal and you can see all the data is synced.
5) Calendar Sync Process Flow:
- Once the record is created in odoo in a calendar, it will automatically sync with the office calendar.
- You can visit Office.com and go to the calendar section where the record that was created in odoo on the specified date with its purpose, has been updated over here.
6) OneNote Process Flow:
- Once the Configuration for OneNote is done, follow the same process for lead creation and proceed with the quotation.
- Once the Project is planned, you can click on the button which will redirect to the OneNote portal where you can see the pages are created with Heading as the Customer name, and a hierarchy is followed which will be further demonstrated.
1) Odoo SharePoint Integration Process Flow
To plan the Project and to proceed with the further process, First, you need to configure the SharePoint credentials into the company of odoo. Figure 1 shows how to get the credentials for configuration.
1) Visit the site https://portal.azure.com
2) You will be asked to log in for the Microsoft Account. After Logging in the following screen will appear where you need to search for App registration.
3) This is shown in Figure 1.0
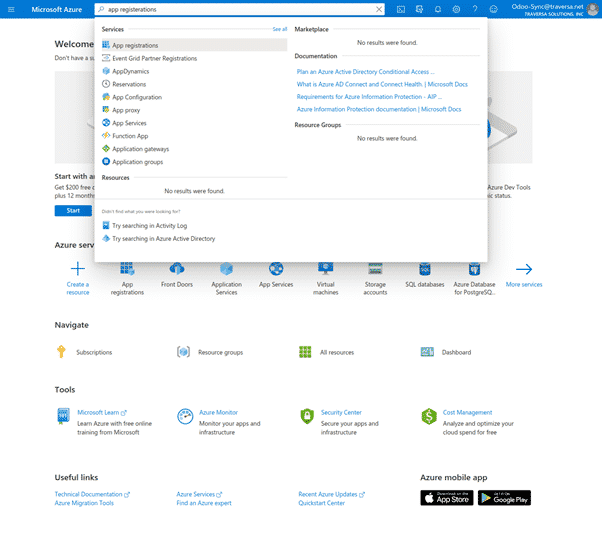
Figure 1.0
Once you click on the above search result, the following screen will appear where the odoo registration app will already be configured. This is shown in Figure 1.1.
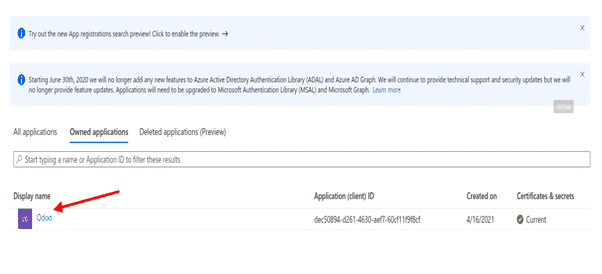
Figure 1.1
Click on the Odoo app and you will see the Application(client) ID is displayed as shown in Figure 1.2
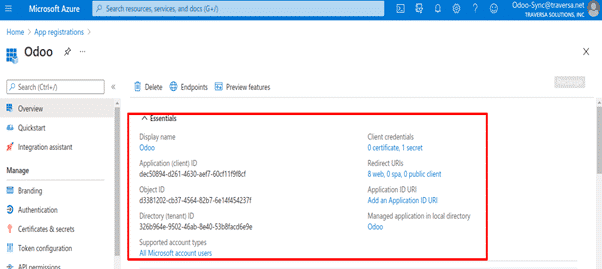
Figure 1.2
Now to get the Sharepoint client secret key, you can click on the Certificates and secrets in the left column of the portal as shown in Figure 1.3
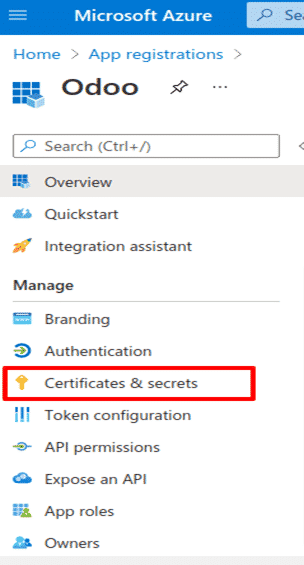
Figure 1.3
- Once clicked, on the above button, there will be an option for a New client secret. When you click on it, a window will appear where you need to write a description of the client e.g name, organization name, etc., and the time for the expiration of the key of that client.
- When you click on the ADD button, you can see the name and the key has been displayed.
- This is shown in Figures 1.4 and 1.5.

Figure 1.4
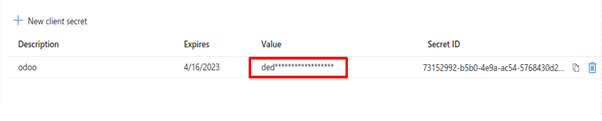
Figure 1.5
- Now, while planning the project and when we want to redirect to SharePoint when we click the button, we need to provide a redirect URL that will redirect us to the SharePoint Portal by getting the token number.
- To Add the URL, go to the Overview button and you can see the Redirect URLs option given.
- This is Shown in Figure 1.6.
- Once you click on the above option, you can see there are already some URLs added.
- You can add your own URL by clicking on Add URL.
- This is shown in Figure 1.7.
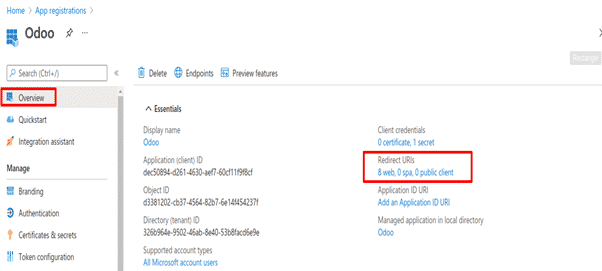
Figure 1.6

Figure 1.7
- Now since we have the client ID, the secret key, and the redirect link, we need to configure it in the odoo.
- Open your odoo instance and type companies. Select/Create a company.
- In this case, the company name is XXX Solutions fill in the General Information tab.
- Now select the SharePoint Tab and fill in the details like client ID, secret key, and Redirect Url.
- This process is shown in Figures 1.8 and 1.9.
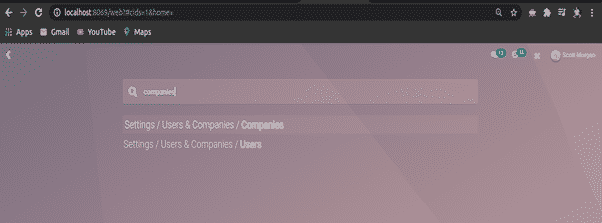
Figure 1.8
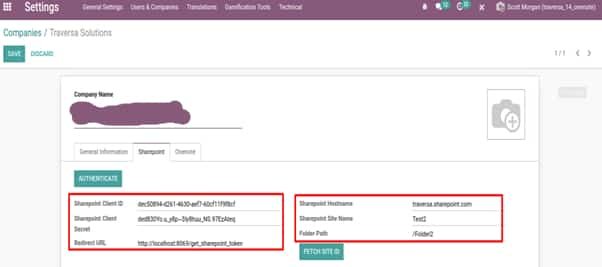
Figure 1.9
- Now once we do the above process, we need to add/specify the location of the data that will be stored in the SharePoint directory in a hierarchy pattern.
- In Figure 1.9, We provided the hostname as XXXX which will open the portal of data related to XXXX only.
- Now since we need to sync the data from odoo to SharePoint, we need to specify the site name so that the date we add or make any change will be updated on that particular site. Here its Test2
- The site may contain different folders, subfolders, etc. so inside the site name we mentioned the path of the folder where all the data of the site and its directory will be stored in this folder. Here it is /Folder2.
- Now since the Configuration is done we need to Authenticate/Valid the credentials and establish the connection between odoo and SharePoint via Odoo SharePoint integration
- Hence click on the Authenticate Button. You will be redirected to another page where you will be asked for login for your microsoft. Or if already logged in, you will get the message that authentication is successful.
- Once the message is displayed you can close the tab/window.
- This process is shown in Figure 2 and 2.1.
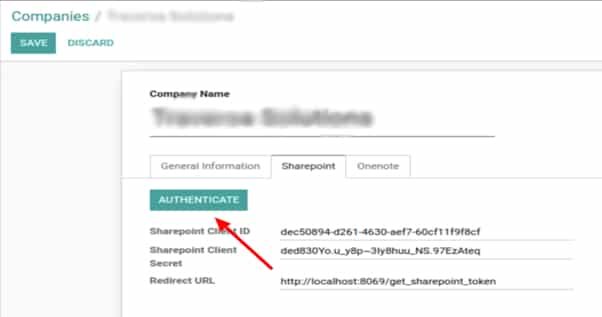
Figure 2

Figure 2.1
- Once you authenticate the credentials, You need to click on the FetchSite ID button.
- This is for fetching the site id of the site name we mentioned and for calling the APIs.
- This is shown in Figure 2.2.
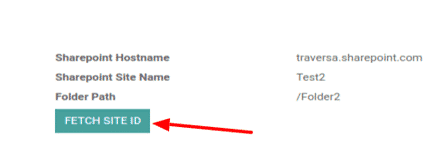
Figure 2.2
- Now as there will be a directory that will be created, we need to configure the data inside the directory in odoo.
- On going to the Project module, click on the Configuration menu as shown in the Figure 2.3 and select the option MS Directory Hierarchy.
- You will see a tree view of the SharePoint directory created that has the hierarchy of the data which will be created at SharePoint.
- Figure 2.4 displays the tree view of SharePoint and OneNote created.
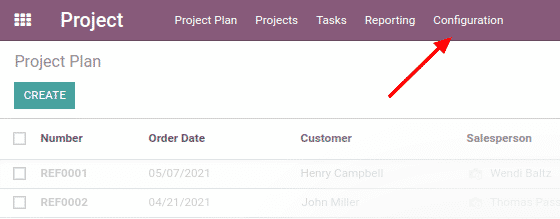
Figure 2.3
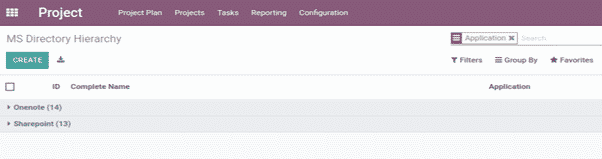
Figure 2.4
- Now if you open the SharePoint option, you will see the categories of data that have been already created like Engineering, Project Management, etc.
- It is shown in Figure 2.5
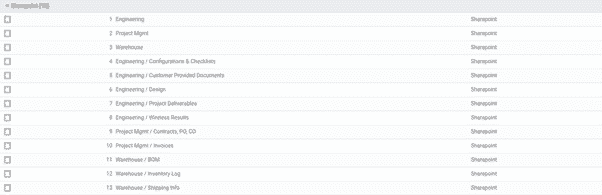
Figure 2.5
- There are also subcategories as you can see Wireless results, Design, etc. which come under Engineering. Hence Engineering is the parent of the above-mentioned two directories.
- Similarly, there are others too.
- You can see the parent directory for eg. and below are the names of the child directories as shown in Figure 2.6
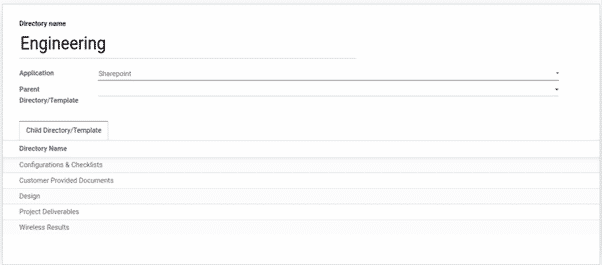
Figure 2.6
- You can create a new directory parent/child and select the application where you want to create this directory.
- As you can see in above figure, the application selected is SharePoint.
- Figure 2.7 displays the creation of new Wireless Results having Engineering as the parent directory.
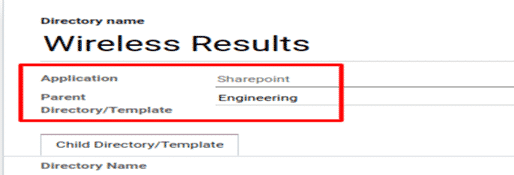
Figure 2.7
- Now since all necessary information is configured, now we need to plan a project from odoo and check the Odoo SharePoint integration connection.
- So here a lead was marked as won, having the Project name Odoo SharePoint Integration.
- Hence we need to proceed with New Quotation which is as shown in Figure 2.8.
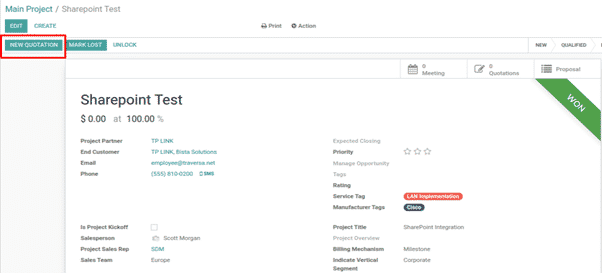
Figure 2.8
- Once you select the XXXX PM, Lead engineer, and all the other fields value, after saving it, you need to plan the project by clicking on the PLAN PROJECT button.
- This is shown in Figure 2.9.
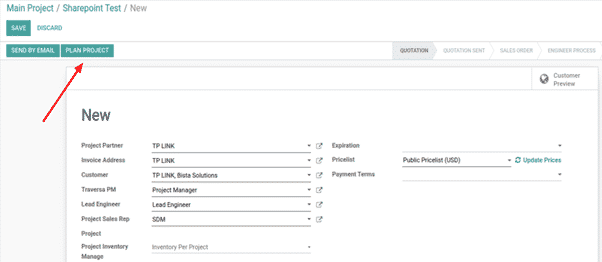
Figure 2.9
After clicking the button, the project has been created. Click on the Project Overview smart button as shown in Figure 3.1.
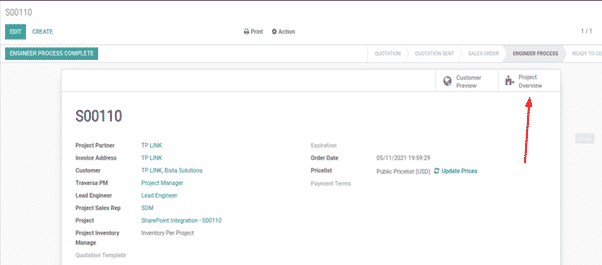
Figure 3.1
- After clicking the smart button, you will see the project is created as per the project name and sale order number.
- This is shown in Figure 3.2.
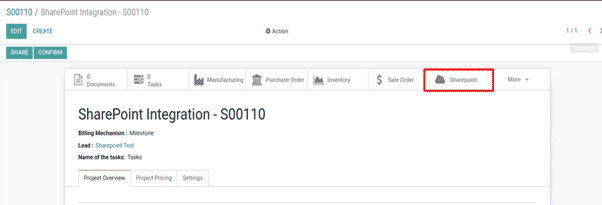
Figure 3.2
- As you can see in the above figure, click on the SharePoint smart button.
- You will be redirected to SharePoint Portal.
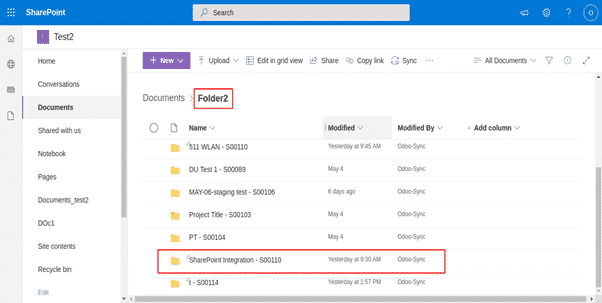
Figure 3.3

Figure 3.3.1
- As you can see in Figure 3.3 and 3.3.1, the Project has been created at site Test2 in Folder 2 that we mentioned while configuring in odoo and the parent directory has also been created.
- If you open a parent directory for e.g Engineering, you can see all the child directories have also been created in it.
- This is shown in Figure 3.4
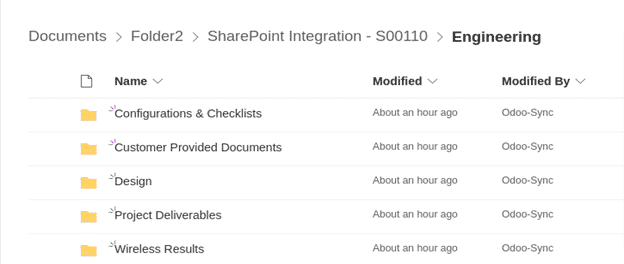
Figure 3.4
2) Calendar Sync Process Flow:
- To sync odoo’s calendar with the office outlook calendar, first you need to go to General Settings in odoo.
- There will be an option below as Outlook Calendar.
- You need to provide the same credentials that are client id and secret key which are provided during SharePoint Configuration.
- This is shown in Figure 3.5.
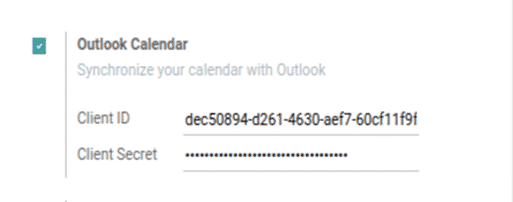
Figure 3.5
You need to add the redirect URL for Calendar sync in azure portal as we did for SharePoint Portal. Figure 3.5.1 displays the url process.
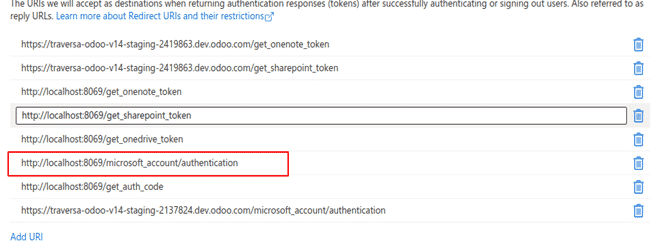
Figure 3.5.1
- Now go to the Calendar module in odoo. You can see there is a green baar in the right side which says, ‘Synced with Outlook’.
- This is shown in Figure 3.6
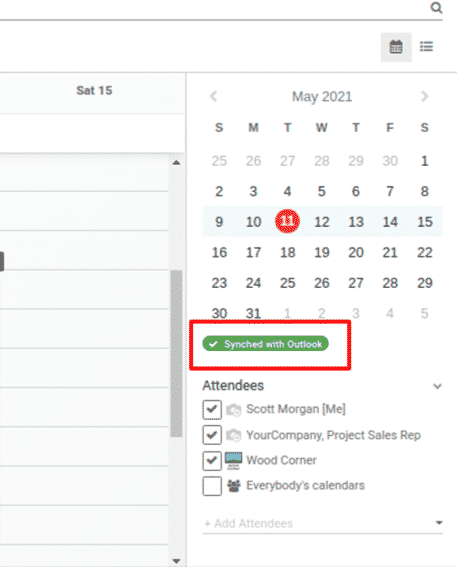
Figure 3.6
- Now suppose you want to create a new event on a particular day so that you can get a reminder for it.
- Here we have created an event called Project Planning Discussion on 12th of May 2021.
- This is shown in Figure 3.7.
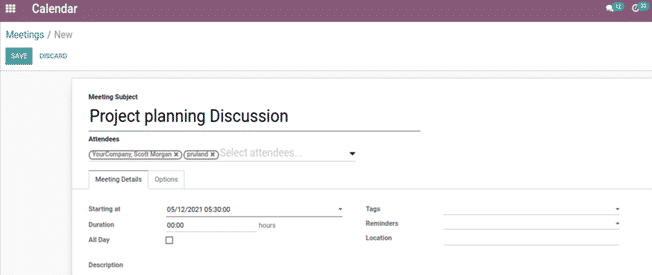
Figure 3.7
- Here I invited Mr. Philips and it was created by Scott.
- When you save it and visit to https://outlook.office.com/ and go to calendar, you can see the message with subject name is displayed on the date we selected above.
- This is shown in Figure 3.8.
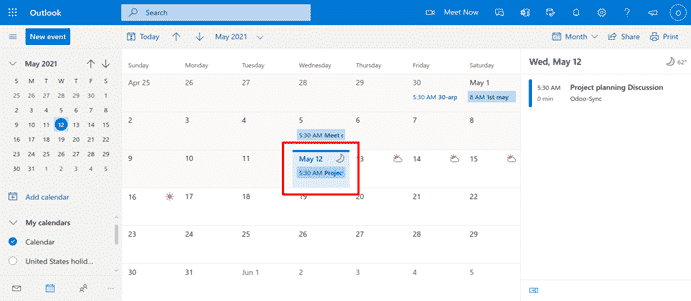
Figure 3.8
3) OneNote Process Flow:
-
- As we already have the credentials for SharePoint, the same credentials are used for configuring OneNote.
- There is a tab after SharePoint named OneNote where we need to configure the credentials.
- Be aware that one needs to configure SharePoint before proceeding for OneNote Configuration as per this documentation.
- Following the same process as SharePoint Configuration, Figure 4.0 displays the OneNote Configuration.
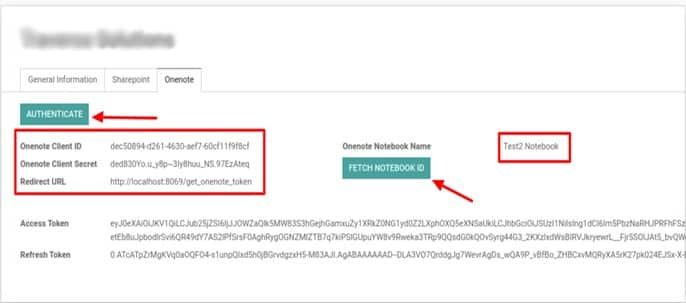
Figure 4.0
- Here we need to set the Notebook name where we need to create tha pages or data.
- Here the name is Test2 Notebook.
- Click the AUTHENTICATE button and then on the FETCH NOTEBOOK ID.
- Now as we created a hierarchy directory for SharePoint, similarly we have created for NoteOne too. Go to configuration and then MS Directory Hierarchy
- Figure 4.1 displays the directory structure.
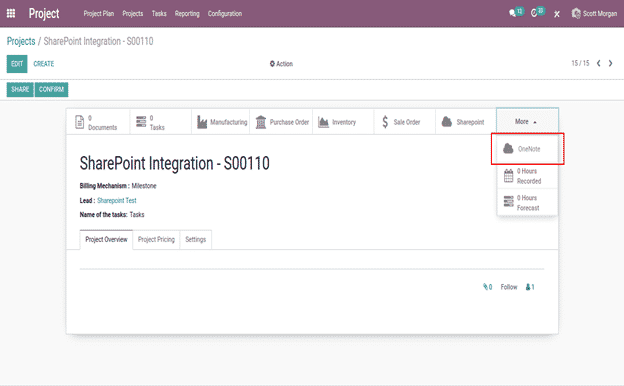
Figure 4.2
- You can now see the OneNote Portal has been opened and you can see the Test2 Notebook has been opened with the customer name as the heading name.
- This is shown in Figure 4.3
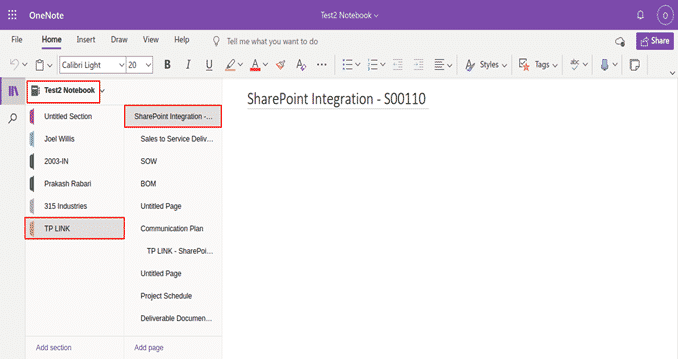
Figure 4.3
- You can see as our customer was TP-LINK, hence the pages have been created inside it with Project Title combined with the Sale order number.
- Also, the data is also created automatically if you open a page inside it. For e.g Communication Plan page.
- Figure 4.4 displays the data.
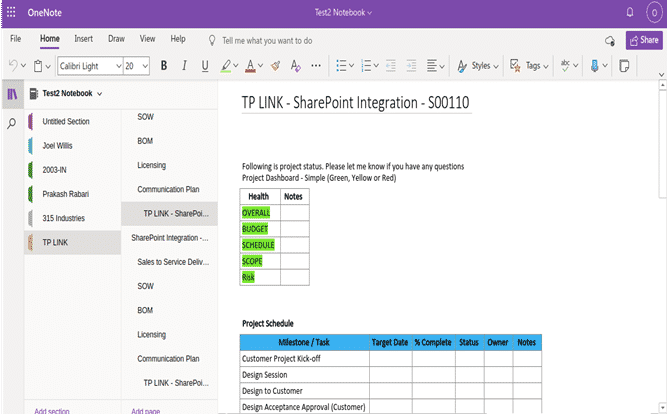
Figure 4.4
Get a free consultation!
Every business has unique needs. At Bista, we consult with you and design solutions to meet your business requirements. Fill out your information below and one of our representatives will be in touch:


