
All you need to know about odoo inventory management module
Odoo Inventory Management is intended to scale from a few thousand operations to many various transactions. It helps businesses manage their product or asset inventory without any hurdles. Odoo inventory management is the best double-entry integrated inventory & tracking system for warehouse management. With the Odoo inventory management module, you can manage your warehouse, vendors, purchase flows, etc.
The first step in inventory is creating a product.
Path: Inventory → Master Data → Products → Create.
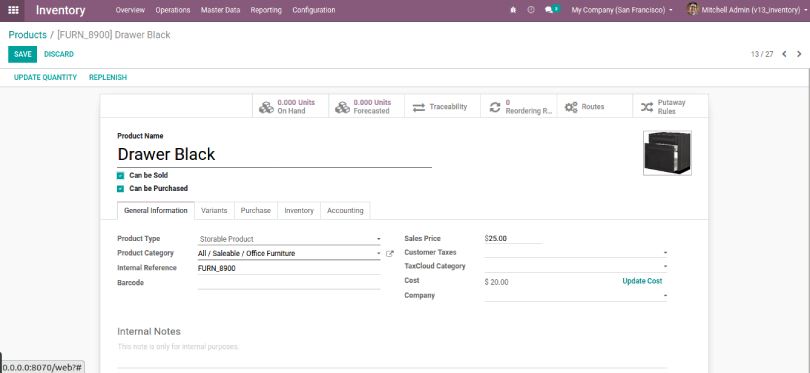
Product Name: Enter the name of your product.
Product Type: In case you set the product type as ‘Storable,’ then you can track the stock of the product and know how many units are in stock and the forecasted number of units. If you want to include a product on receipts/deliveries but don’t need to track its stock, then you can select the type ‘Consumable. ’ This will help you to set up Products in Odoo inventory management,
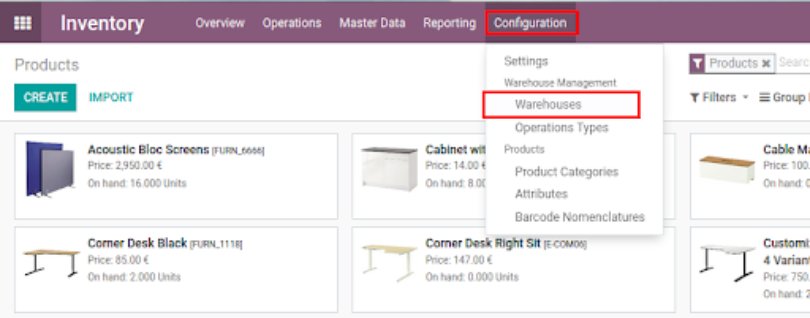
Configuration
- Warehouses: The warehouse is the actual place in which the items are stocked. You can set up multiple warehouses. We can have a warehouse for a company and we can keep different locations in the same.
Path: Inventory → Configuration → Warehouse Management → Warehouses.
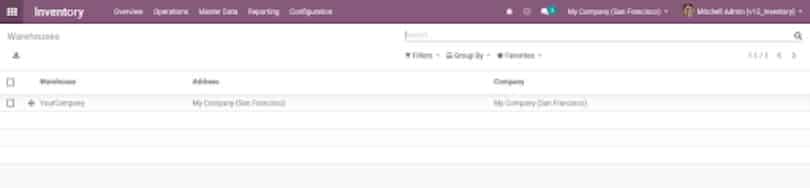
When you click on the menu you will see a list of Warehouse. Here we have only one warehouse. You can add any warehouse to Odoo inventory.
If you want to create a new warehouse, you should enable the Multi-Warehouse settings. Note that the Multi-Location settings will be automatically enabled at the same time, and click on the save button. Which will help you to save multiple warehouses inside the Odoo inventory module.

After enabling the multi-warehouse settings, you can create a Warehouse.

Warehouse: Add your warehouse name.
Short Name: You should also choose a short name for your warehouse, which is 5 characters long and is used on the different warehouse documents.
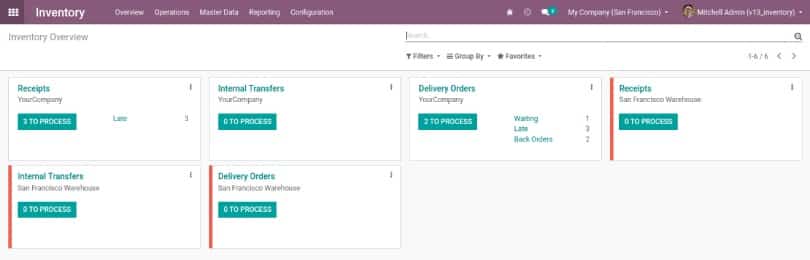
Address: You can select an existing company, or you can create a new one. Therefore, the address of your warehouse will be the same as the one of the companies you selected. After the creation of a new warehouse, you can go back to the Dashboard/Odoo Inventory Overview.
Path: Inventory → Overview.
You will see the new operation types automatically created due to the creation of a new Warehouse.
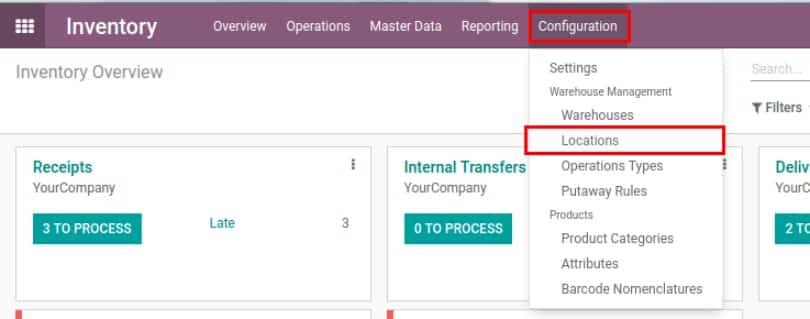
- Location: Location is the specific place within the warehouse. It can be a sublocation of your warehouse as a shelf, a floor, etc. Therefore, a location is part of one warehouse, and it can not be linked to multiple warehouses. One can create multiple locations and sublocations such as shelves, racks, etc.
Path: Inventory → Configuration → Location.
Once you click on the Location menu, you can see the list of locations, as shown in the image below.
Locations are very important to configure as we need to make sure of the inventory where it has been stored and where it went.
We have created some of the locations, and we need to configure all the locations from where we are getting the stock(Vendor Location), which is already configured, and where we are sending the stock(Customer Location), which is also configured.
However, we can create more locations for Customers and Vendors if we want. Similarly, we have locations for scrap or Inventory loss.
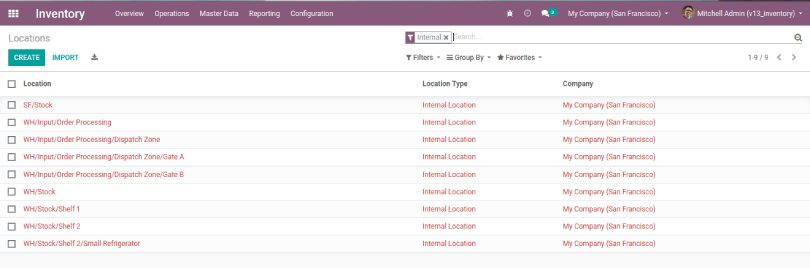
These are virtual locations and do not exist in our proximity. We can also create internal locations where we are sending the goods internally. If it is consumed, it should be a production/customer location; otherwise, the stock will be shown as still existing in stock.
When you click on any of the locations in the list, you can see the following form.
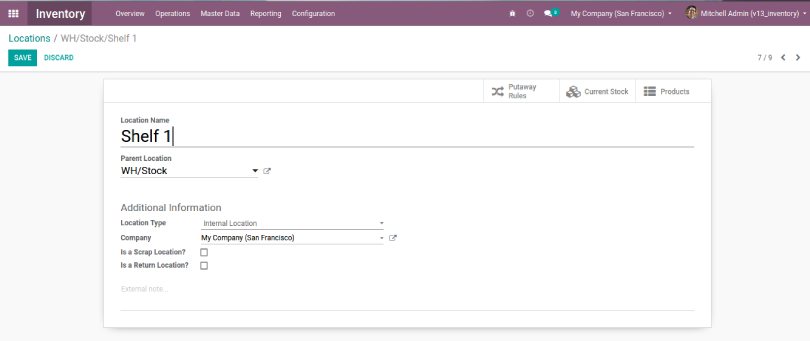
Location Name: Name of the location.
Parent Location: If you are keeping in your stock, then make sure to add the main stock location, as shown in the above image. If you are creating a location for scrap,
customer, production, then it’s not required to add stock as the parent location.
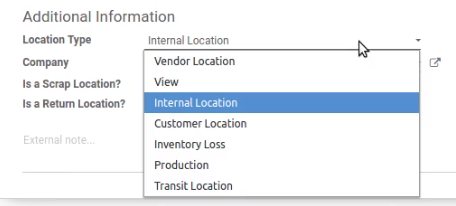
Location Type: There are multiple types available, as shown in the next image.
Vendor Location is used for the Supplier’s Location. This location is treated as our virtual location from where we receive the products in our stock.
The view is always a parent location. When we have a hierarchy of locations, it is always advisable that you keep the parent location to view the location as the transaction of the goods will happen to the children, which do not have any further subordinate locations.
An internal Location is a location that is available internally in our stock. We can have multiple locations where we can keep our stock. Here, we will maintain a hierarchy, as discussed before, so that we will get an accurate inventory value for the stock that we have.
Customer Location is the location of customers where actually we are delivering the goods from our stock. This is also a virtual location that we just imagine using when we are selling the goods.
Inventory Loss is the location that is used when we have scrap products or lost products or when we adjust the inventory of books with real-time inventory. The adjustment moves have this type of location.
Production is the location where actually the products are actually being consumed for manufacturing or any other reason. A restaurant or kitchen can be treated as a production location when the goods are being consumed.
Transit Location is the location that is used only for transit. For e.g., a Quality check location or Packing Location or when you use Pick Pack Ship the locations can be used as transit locations.
You can select the right type that matches the location that you’re trying to create.
There are two checkboxes: Is a Scrap Location? And Is a Return Location? As the name describes, check whether it’s a scrap location and return location or not.
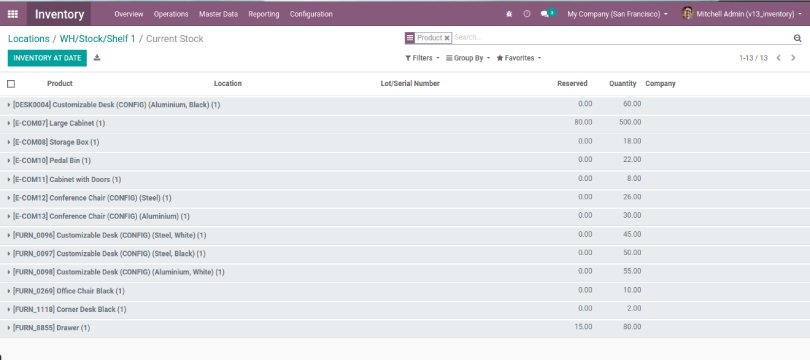
There are 3 smart buttons. Current Stock: Clicking on this will give you a list of products which is the current stock available at this location, as shown in the next image.
- Operation Types: Operation types are the types of operation that are used in terms of transferring goods from one location to another.
There are mainly 3 types of operation: 1. Receipt, 2. Delivery, and 3. Internal Transfer.
Path: Inventory → Configuration → Operation Types.
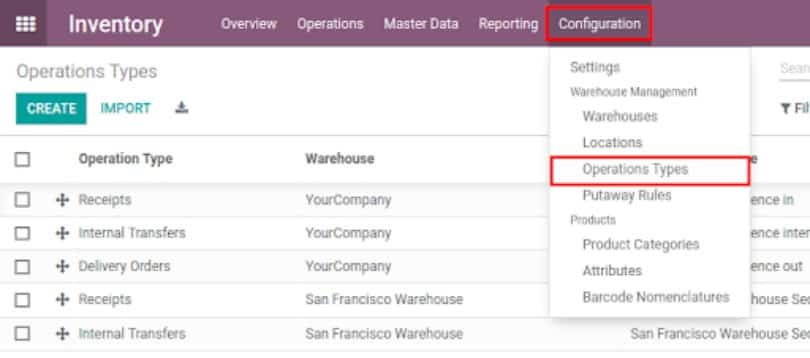
You will see a list of operation types. Click on any of the types or click on Create to create a new type.
Operation Type: Name of the operation type.
Type of Operation: Select whether the type is Receipts, Delivery, or Internal Transfer.
Operation Type for Return: If we have the operation type and we want a specific type for return, then we can select this.
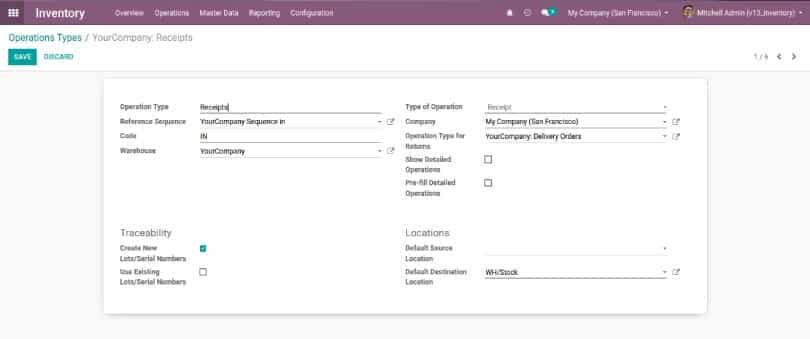
Create New Lots/Serial Numbers: If we want to create a new lot/serial number during the transaction of the operation type, then select this checkbox.
Use Existing Lots/Serial Numbers: If we want to use the existing lot/serial number during the transaction of the operation type, then select this checkbox.
Now there are default locations Default Source Location and Default Destination Location which need to be configured on the Operation Types. If the Type is Internal, you can change the location on the operations, but for Incoming, it will be possible to change the destination location, and for Outgoing, it will be possible to change the source location.
If you choose Vendor type, it is mandatory to select the destination location. Usually, we keep it as a stock location. For Customer type, it is not mandatory, but we should configure the location. For the internal type, both locations are mandatory to be configured. The screen itself will force you to do so when you select a specific type.
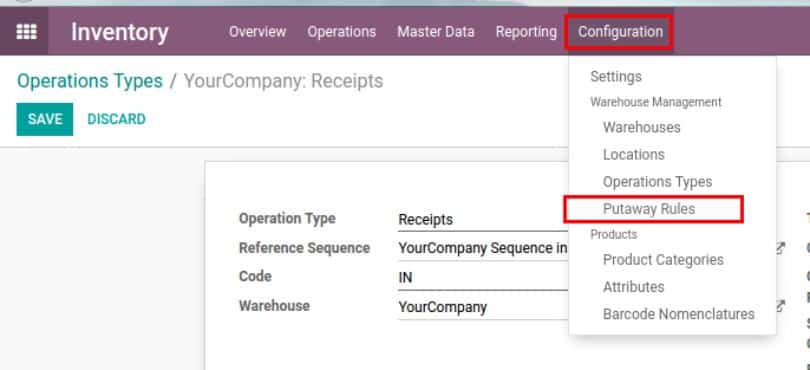
- Putaway Rules: Putaway is the process of taking products off the receiving shipments and directly putting them into the most appropriate location.
Example: In a retail store storing vegetables and fruits, we have to store vegetables in vegetable locations and fruits in fruit locations, and they are in the same warehouse stock. That’s where putaway rules intervene to avoid storing products wrongly.
The putaway rules can be defined either per product or per product category.
Path: Inventory → Configuration → Putaway Rules.

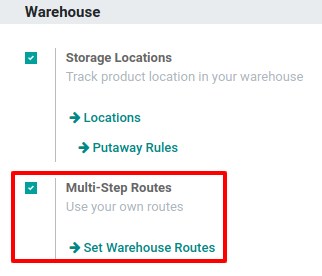
- Configuration: Enabling the Multi-Step Routes will enable the storage location automatically.
Path: Inventory → Configuration → Settings.
- Product Categories: As the name describes, categories are used to categorize or classify the products in different sections. You can create or configure it as per your requirements.
Path: Inventory → Configuration → Product Categories.
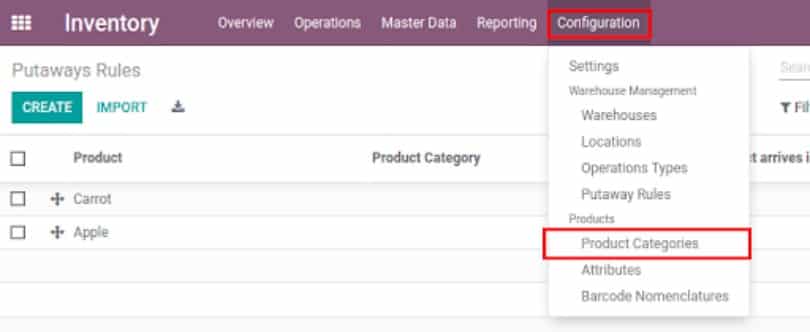
This will open a list of product categories. Click on create for creating a new category.
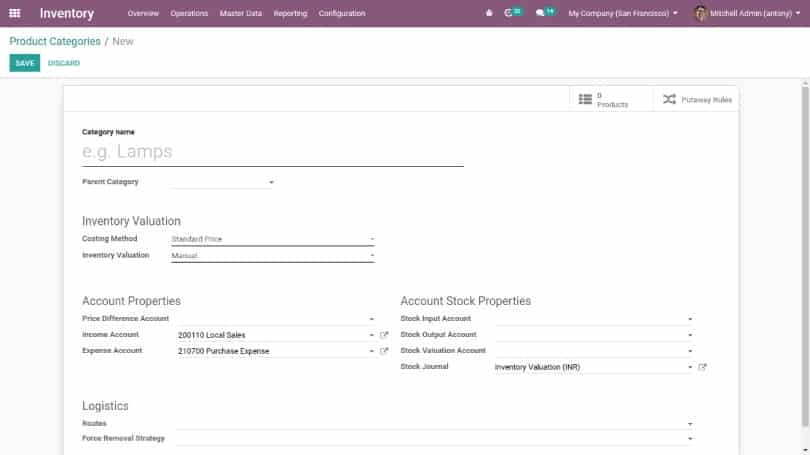
Category Name: This is the name of the category that you can give as per your requirement.
Parent Category: is the parent category of this category.
Routes: Here, we shall mention the removal strategy that is used while there is no source location given for the category.
Here we have 3 types of removal strategy in odoo inventory management.
FIFO: First In First Out.
FEFO: First Expiry First Out.
LIFO: Last In First Out.
Costing method: here we have 3 types of costing methods,
Standard price: products are valued at their standard cost given on the product
First In First Out: products are valued based on First entered in and first leave.
Average Cost: Valuation based on weighted average cost.
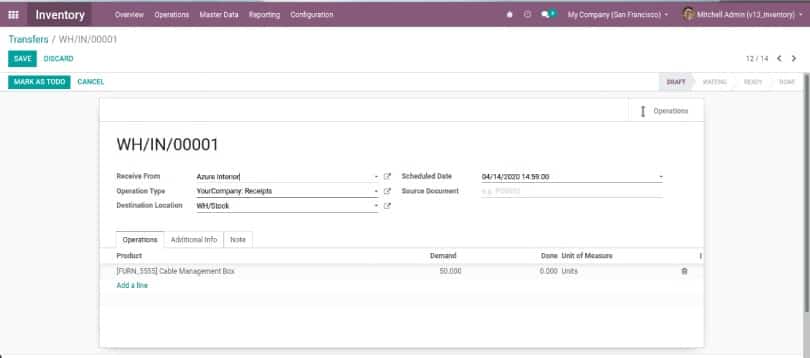
Receive Product in stock:
After creating a product, you can receive the products by following steps.
Path: Inventory → Operation → Transfer → Create.
This will open the form view of the transfer.
Operation Type: Select the type of Receipts for receiving products.
Received From: Select the vendor from which you are receiving the product.
Destination Location: Select the destination location of your product.
Scheduled Date: Add the date scheduled for receiving the product.
In the operation, you need to add the details of the product name and quantity in ‘Demand’ for receiving the products.
Once all details are completed, click on the ‘Mark As Todo’ button.
Click on the Validate button to complete the Incoming transfer.
Scrap Order:
At any stage of the production line, we can scrap the product. In all the production stages, we can find the tab of scrap. When we click on the scrap, we can immediately transfer it to scrap.
We can also create scrap manually from,
Path: Inventory → Operations → Scrap Orders → Create
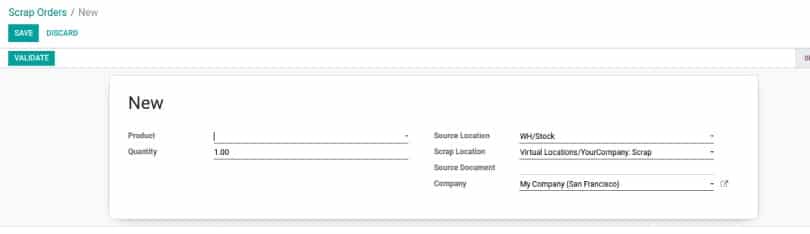
Product: Select a product that is scrapped.
Quantity: Add quantity.
Source Location: Add the location from where the product was scrapped.
Scrap Location: Select the scrapped location.
Once all the details are filled, you can click on the “Validate” button.
Reporting: Now we will see reporting available for Inventory Management.
- Inventory Report: This is the report that shows the current inventory or inventory on a specific date. The calculation of the inventory is done based on the movements till the current date.
Path: Inventory → Reporting → Inventory Report
If you want to print the report till some specific date, then click on the button ‘Inventory At Date. ’ This will open a pop-up. Select the date and click on the confirm button. This will show you the report.
- Forecasted Inventory: Odoo inventory Forecast is the way towards ascertaining the stock expected to satisfy future client orders dependent on how much product you anticipate to sell over a particular time frame. With Odoo 13, inventory forecasting is all easier. One can quickly retrieve the forecasted inventory with the help of new graph and grid views.

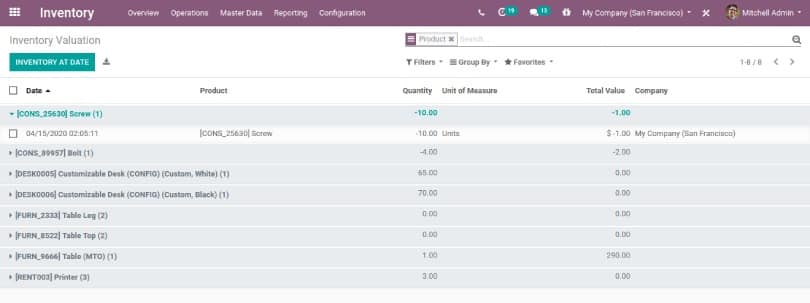
Inventory Valuation: Odoo’s inventory Valuation Report shows the value of the available product. The value is calculated based on the Cost Price, which is configured on the product

Here, first is the Product, then the quantity available along with UoM, and finally, the Value is the total value of the product available. As mentioned before, Value is the multiplication of the quantity of the product and the cost price configured on the product.
- Product Moves: Now, when you want to see the product movements from one location to another location, you can see it by clicking on Inventory → Reporting → Product Moves.
Now, when you click on this menu, you will be redirected to the list of product moves, as shown in the next image. On this move, you can use the filters and group by to view the product movements as per your requirements.


For more information, you can reach us using our contact form or at +1 (858) 401-2332.