

Odoo Invoicing

Are you still entering all your transactions manually on an excel file? It’s time to migrate to odoo, and also understand the importance of odoo invoicing and how it helps to automate Invoices.
When it comes to simplifying your invoicing processes, Odoo ERP is the answer to all your questions. With its user-friendly application. You can create invoices from sales orders, and delivery orders or base them on time and material. Odoo invoicing module is scalable & also customizable.
By directly linking your bank accounts, you can easily track your payments, create professional invoices and manage your bills effortlessly.
Company Configuration in Odoo
In order to set up your company account and commence your invoicing process, go to your Odoo and click on settings.
On clicking on settings, it will redirect you to the basic settings page. Where on the top menu trigger Users & Companies > Companies. Here you can view all the companies which have been set up and you can configure a new company by clicking the CREATE button on the top.
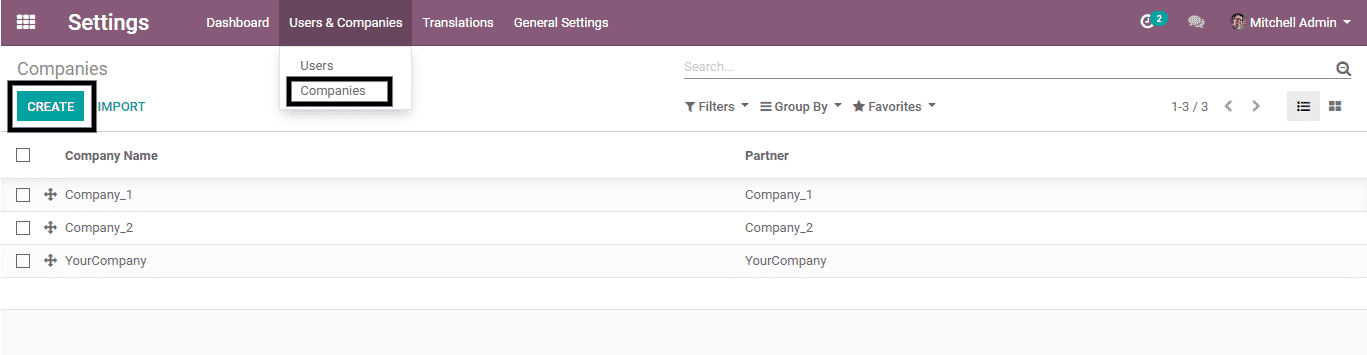
It will open a form view where you can add your Company Name and update the required details under the General Information section. The details added reflect in customer invoice. Lastly, save the record by clicking the SAVE button on the top in Odoo invoicing section.

Odoo Document Template
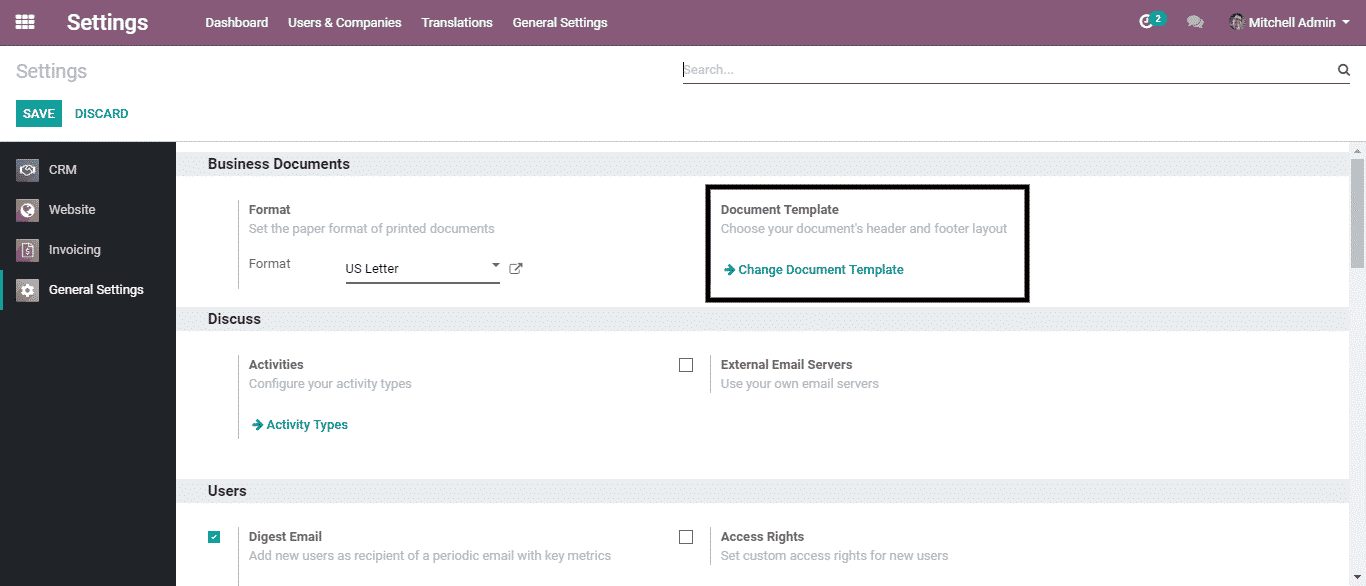
After setting up your company details. Now you will require a template for your invoice document for that just click General Settings on the top which will redirect you to the Settings page. In which under Business Documents section you have Document Template, just click Change Document Template.
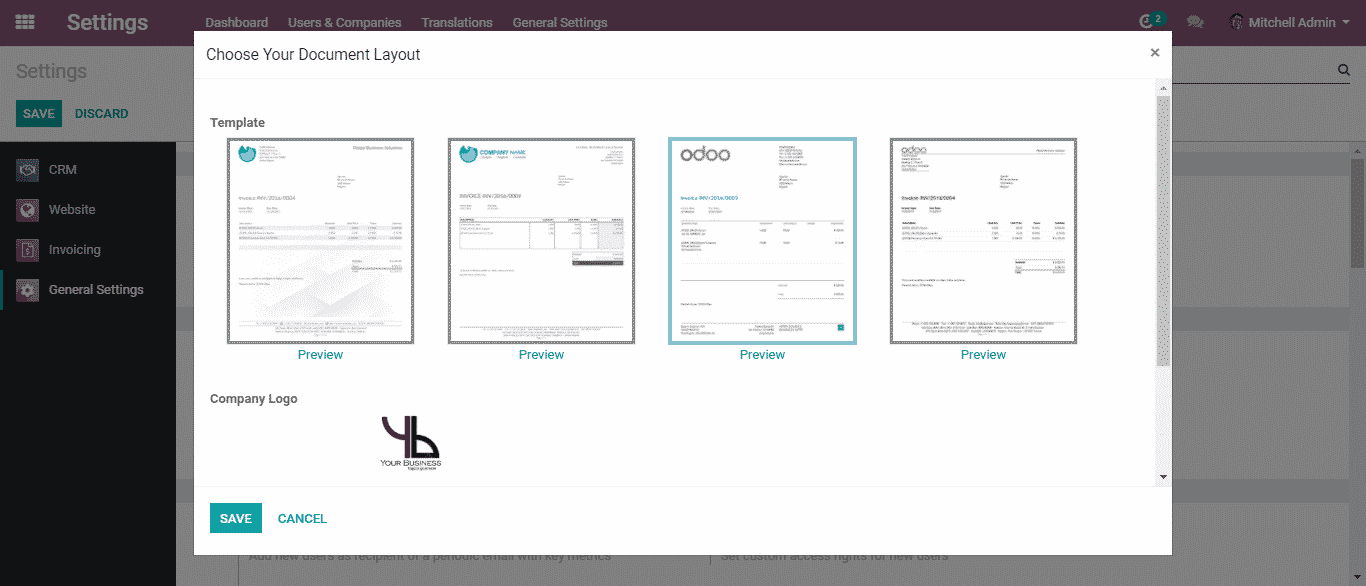
On clicking the Change document Template button. The predefined template image will pop up from which you can choose and open the document template layout for your document and save it by clicking the Save button on the bottom.
Payment Method Setup
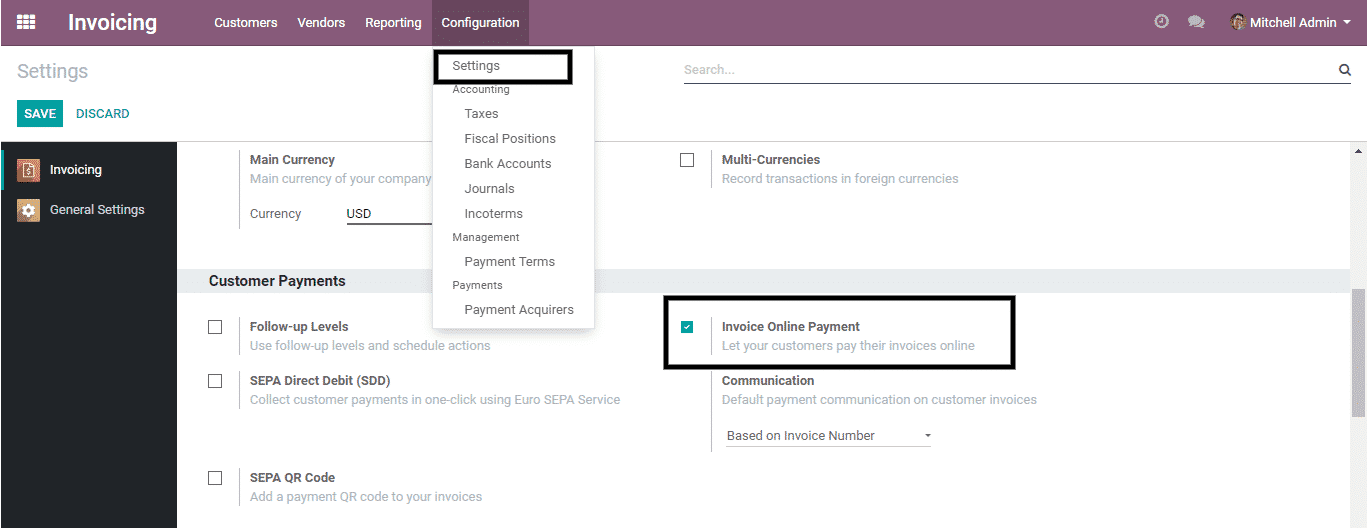
Odoo ERP has made the payment process and invoicing easy. To allow your customers to pay online all you have to do is just go to Configuration > Settings and Under Customer Payments enable Invoice Online Payment.
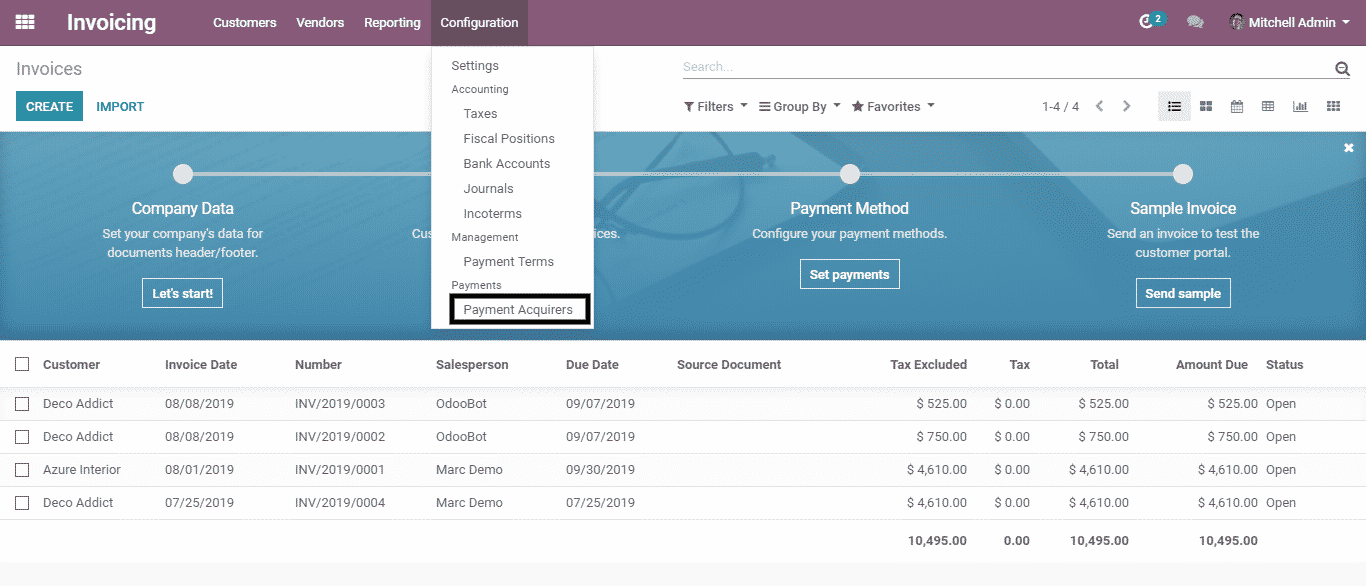
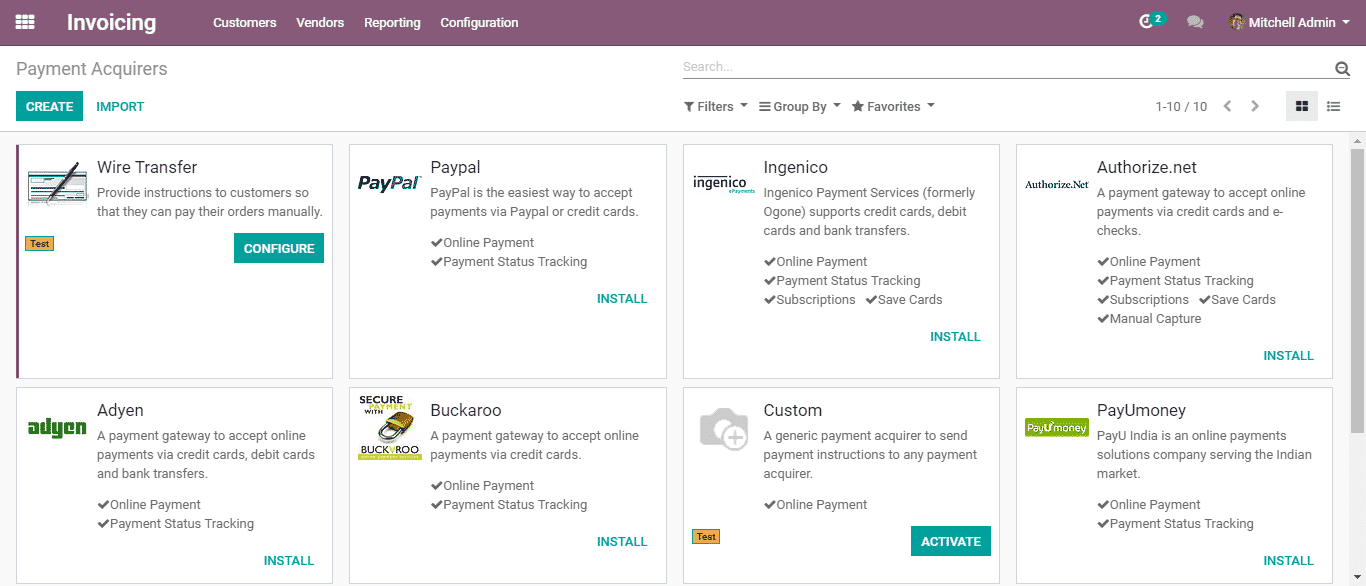
To configure an online payment method for your invoice. Just trigger Configuration > Payment Acquirers, it will display the list of acquirers available and you can configure any of them until now and activate it.
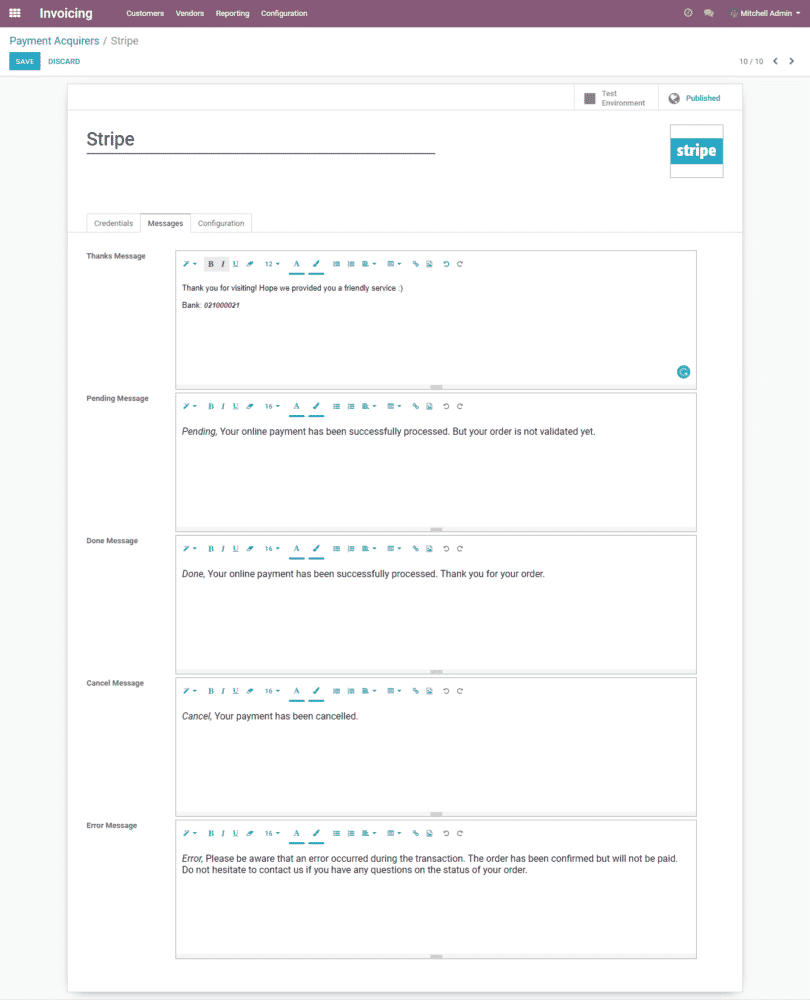
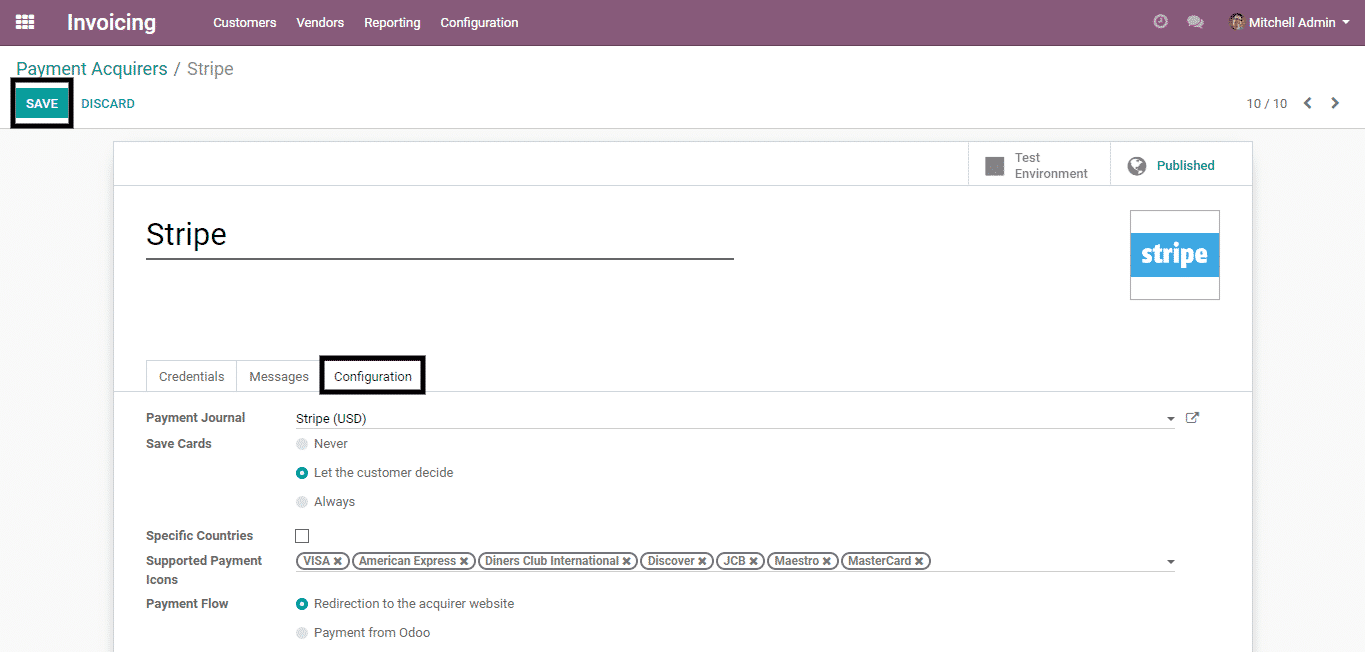
To activate it just trigger the specific payment acquirer which will display the detailed description of that acquirer. On the top, you can view the smart Publish tab, by triggering that you can publish it. Once you do that smart button will be updated to Published now by triggering that Published button. You can unpublish that payment acquirer in Odoo Invoicing.

In the screenshot above you can view the Credentials section under that you can set the password for the selected payment acquirer.
In the Messages section, you can update messages for the customer in each schema.
If some error occurred during the transaction you can add a message to be displayed in the Error Message textbox.
If the transaction has been canceled the message related to that can be displayed in the Cancel Message textbox.
Message after the successful transaction can be displayed in the Done Message textbox.
The status of the order before validation can be displayed in the Pending Message textbox.
You can even add the acknowledgment message for the customer in the Thanks Message textbox.
You can even include your bank details in the message so that if the customer wants to Wire Transfer the capital it will be convenient for them.
Payment Configuration
Then you have Configuration section. Where you can set up a basic configuration for the payment acquirer. Such as you can define the Payment Journal, and enable options as per your preference to Save Cards. You can enable Specific Countries and define those countries if the acquirer is limited to certain countries. Add Supported Payment Icons also select the Payment Flow i.e. if the payment should be redirected to the acquirer’s website or should be processed from Odoo.
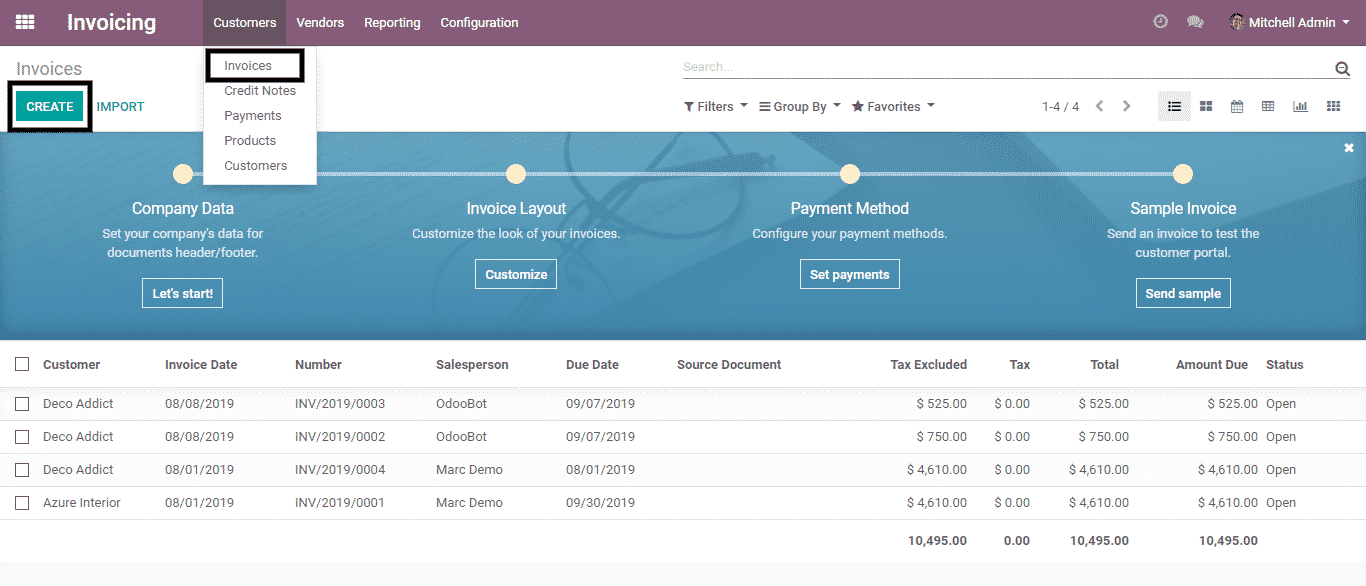
Invoicing the Customer
To start invoicing your customer you can go to Customers > Invoices, here you can view the list of invoices which was early generated. To create a new invoice click on the CREATE button on the top of the odoo screen.
Once you trigger CREATE, it will open the form view where you can update your invoice details of the product.
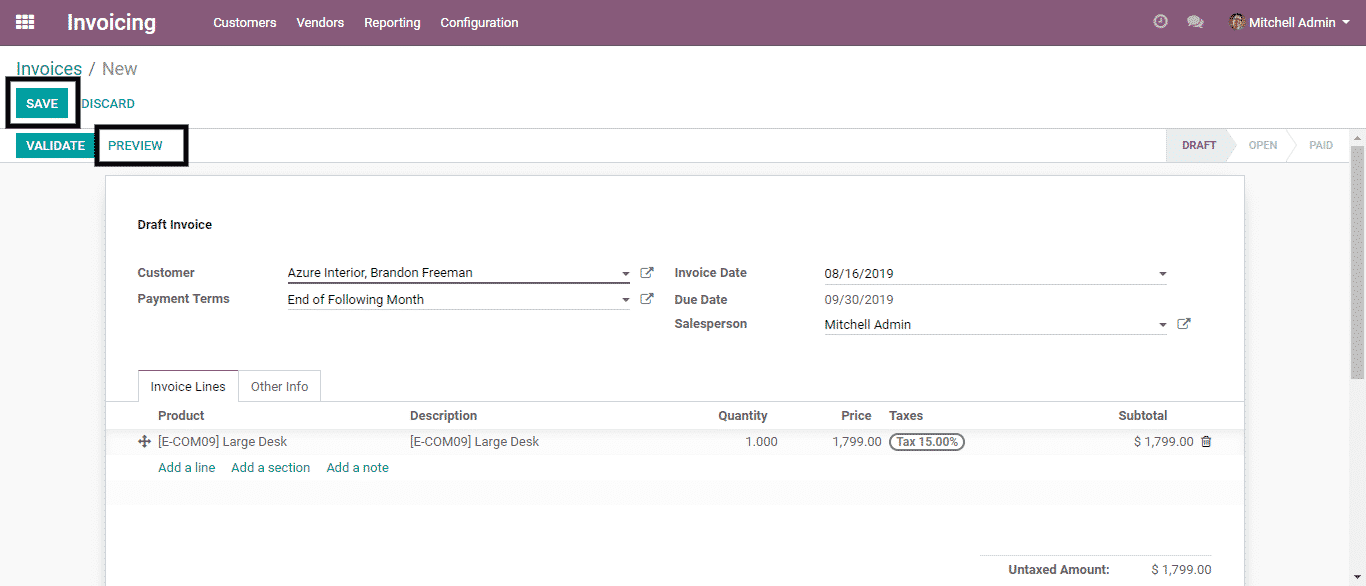
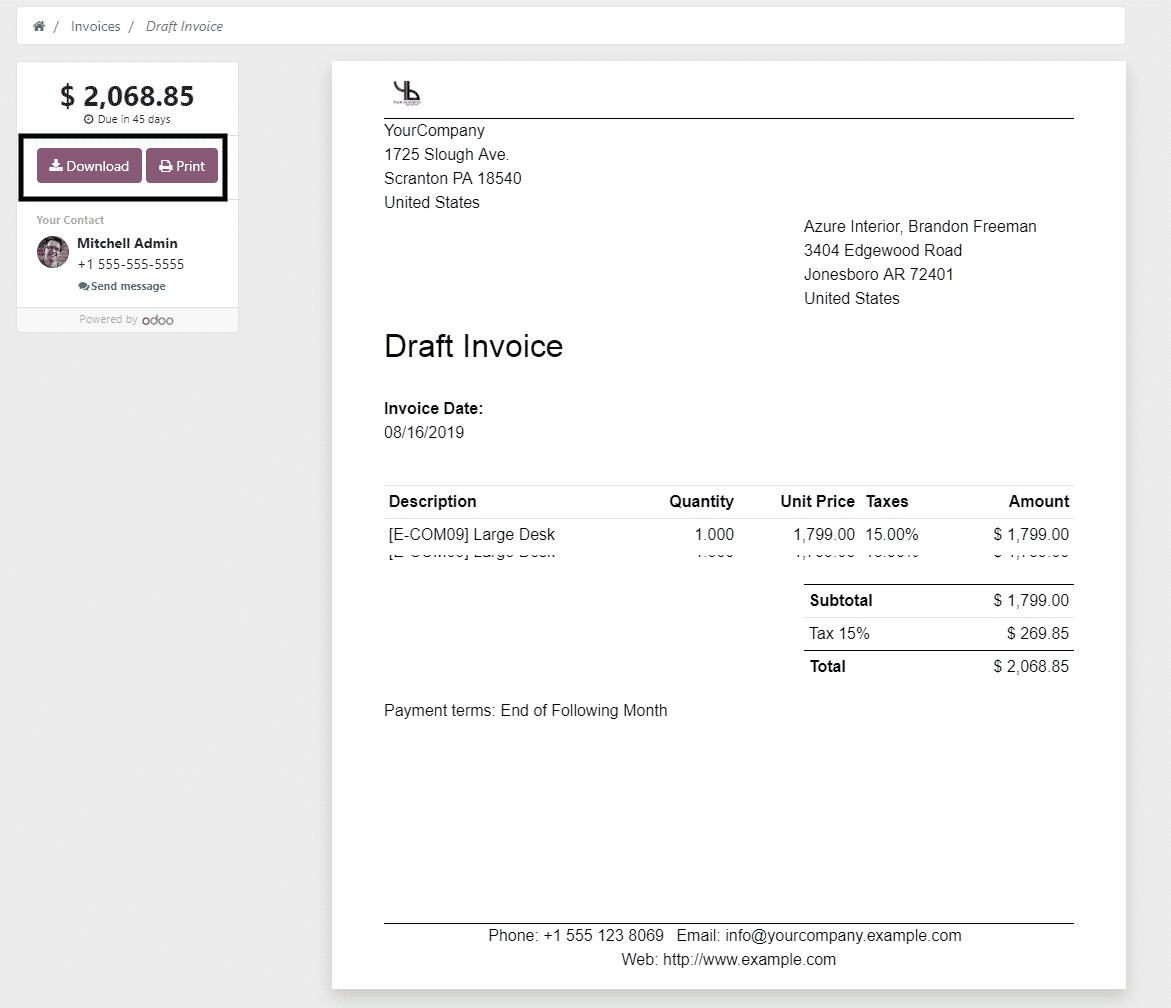
Once that is done you can preview it by clicking the PREVIEW button on the top. It will open the layout of the customer portal for us to review before sending it to the customer. Where customers can either download or print the invoice by triggering the Download and also Print button. Below is the screen for the same.
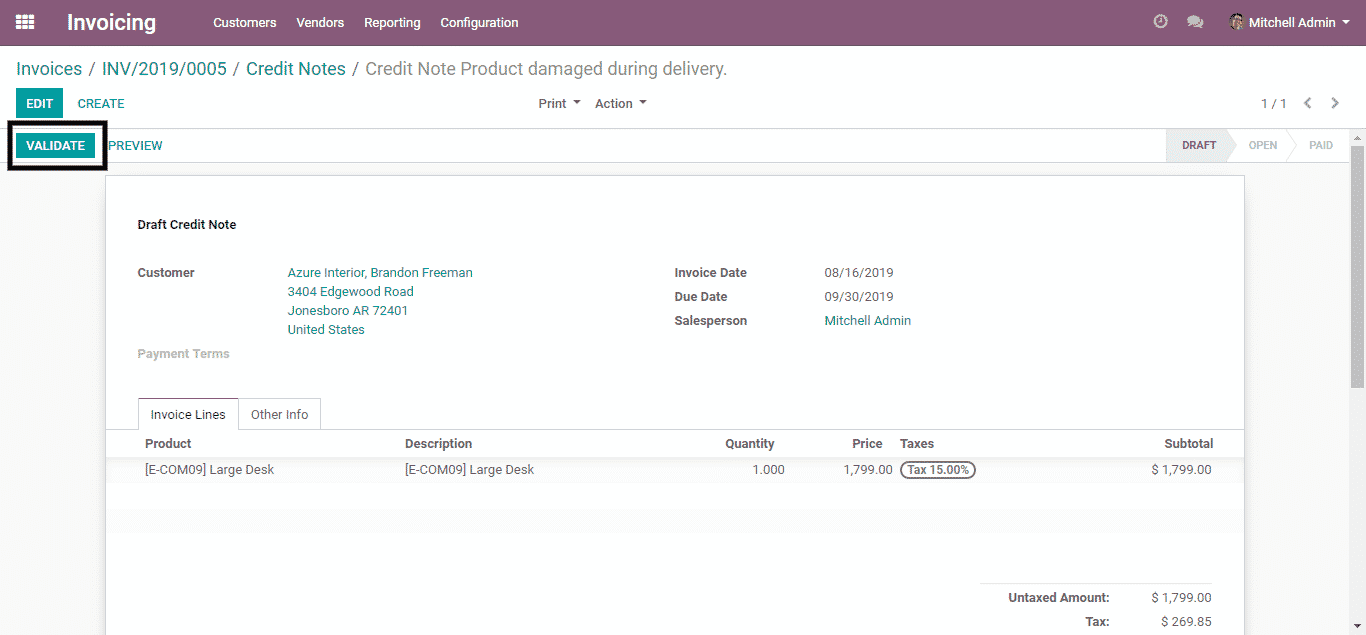
Now, going back to the database, your invoice in the draft state of odoo invoicing, you can validate it by clicking the Validate button.
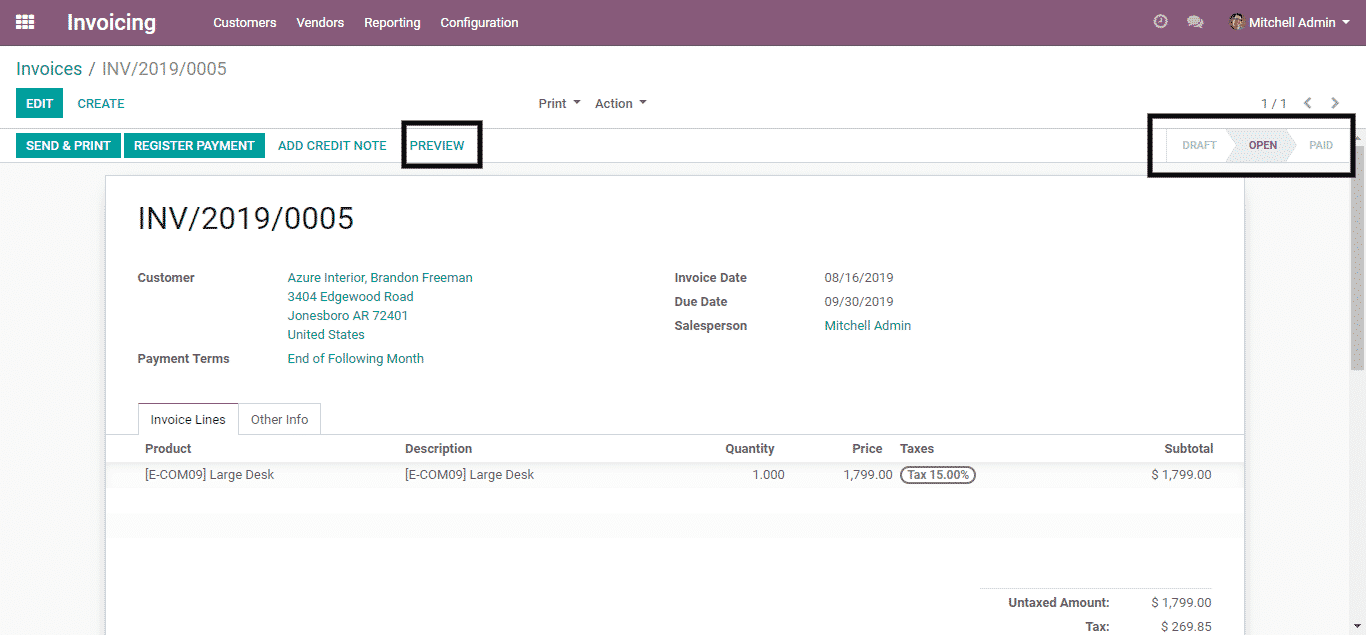
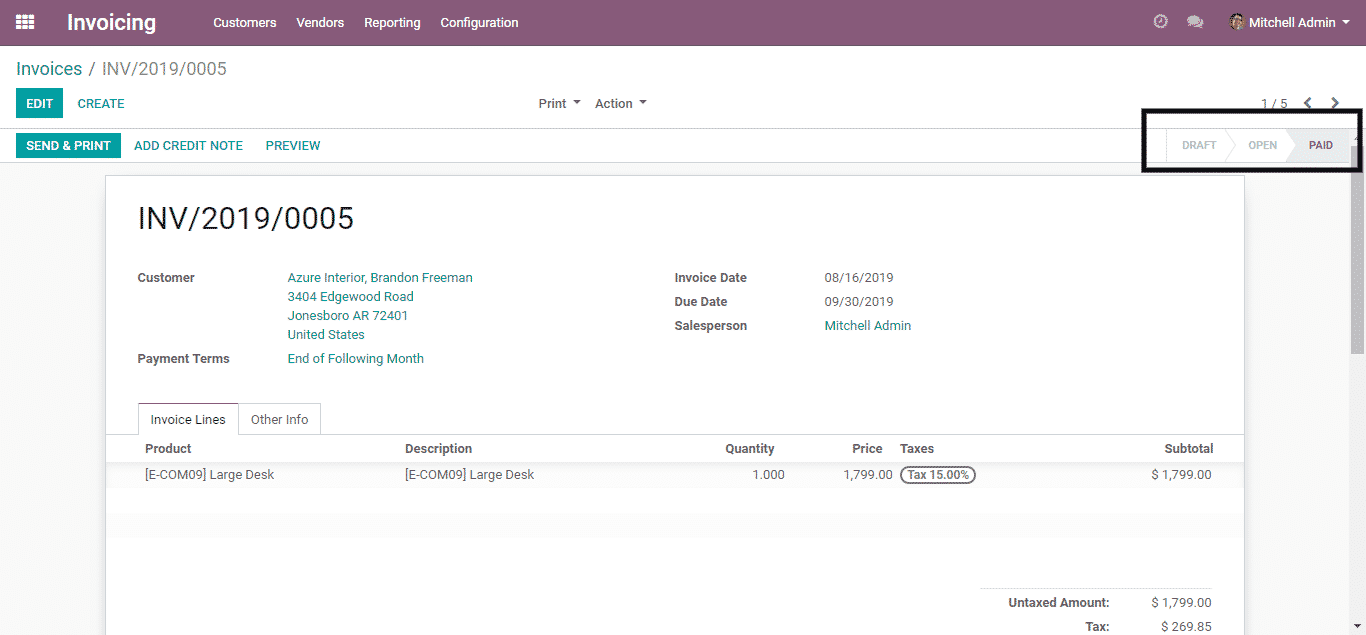
Once the Odoo invoice is validated, it will be transitioned from DRAFT to OPEN state allowing customers to go ahead with payment. Now we can again preview it by clicking the PREVIEW button.
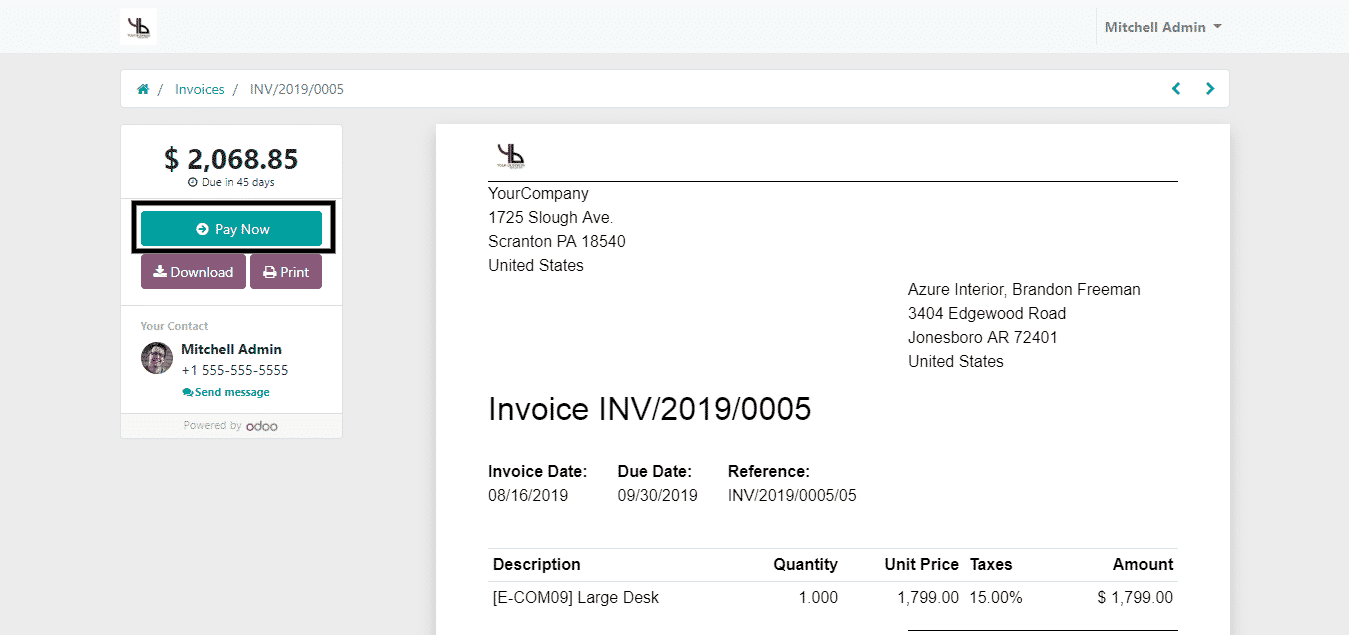
Now once you preview it after validating you can view the Pay Now button as been updated providing the customer an option to pay online.
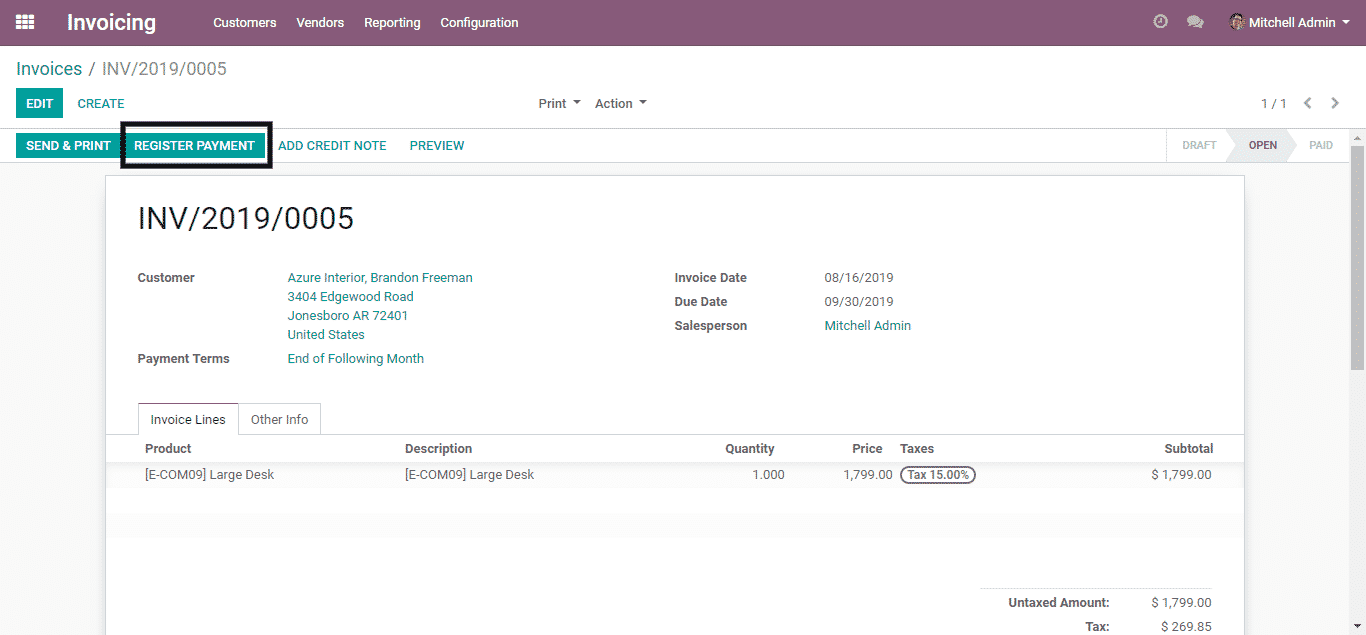
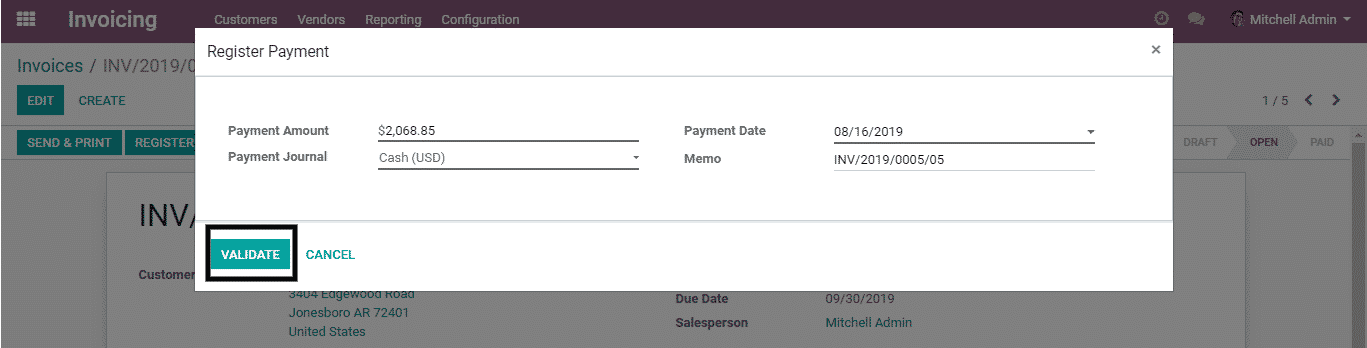
If the customer did not opt for online payment and did the cash payment you can register that payment from the database by triggering the REGISTER PAYMENT method.

Once the payment is validated your invoice will be set to the Paid stage. Odoo Invoicing is best module ever
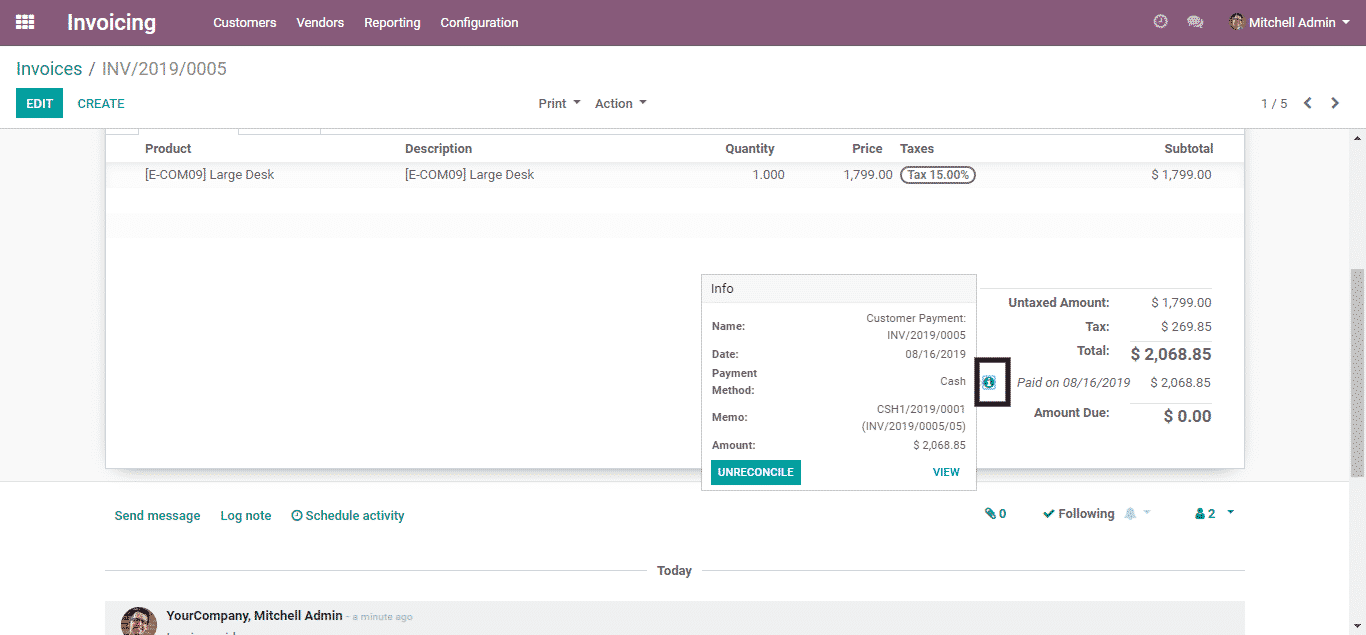
Post payment you can view the info icon updated in the form view below Total amount, triggering that will provide you the details of the payment done by the customer.
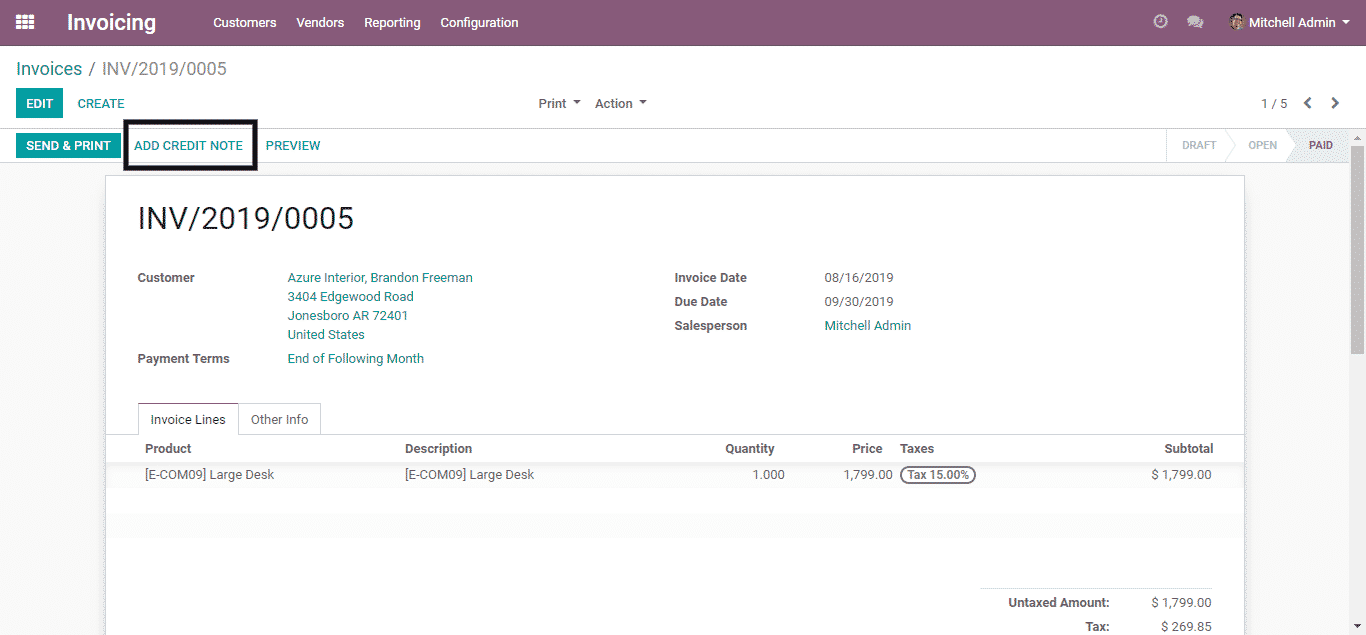
After payment validation, if there is any issue with the transaction or a product. If you want to refund the amount to the customer, you can do that with a credit note. Just trigger the ADD CREDIT NOTE button.
It will open a wizard where you can enable the Credit Method as per your preference, add the refund Reason and click ADD CREDIT NOTE.
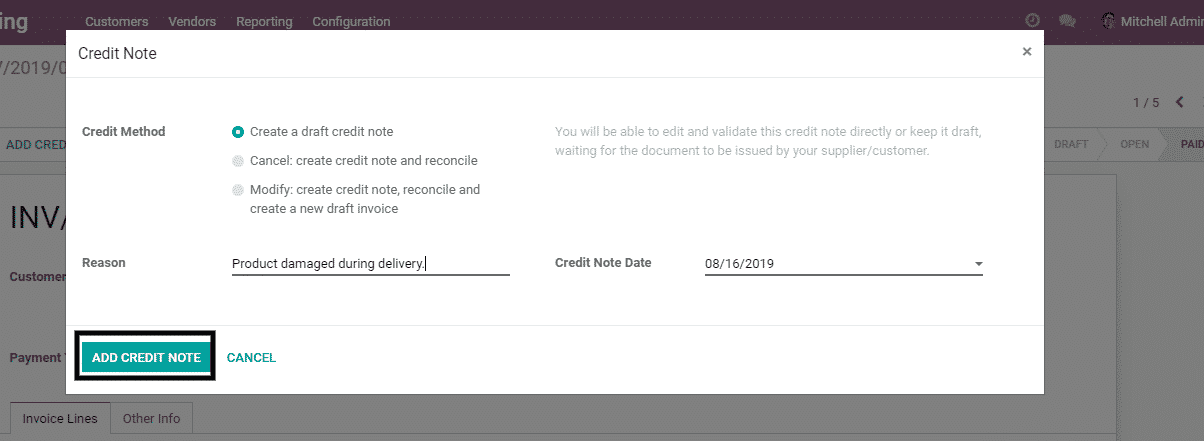
After adding Credit Note, you can validate, and lastly, once the amount is refunded to the customer you can register the payment.

In Odoo Invoicing transactions synchronizes every hour followed by accelerating reconciliation. Odoo’s smart reconciliation tool saves your productive time.
You can instantly generate Odoo invoices and also send them via email in just a few clicks. On successful payment, it instantly reflects on your screen.
You can print checks to pay the vendors in batches or can use the payment integration protocol. With interactive dynamic reporting features, from legal statements to execution summaries everything is efficient and well synchronized.
You can navigate all your company’s data with Odoo’s BI feature. Therefore makes Odoo Invoicing easily manageable to all the custom setups.
Odoo ERP is the best ERP in Industry
Odoo ERP is one of the best open source ERP solutions, it has grown tremendously over several years. It is easy to manage with such broad-level customization available within it. Odoo ERP is a Scalable and Robust enterprise application. You can customize every module/app of it as per your requirement and also define the criteria with very less effort. The idea of Odoo ERP is to automate the workflow of every business by giving them the platform with 10000+ apps with each app scalable and robust. Odoo ERP is 100% open source, Flexible and also fully integrated, Cost-effective powerful yet simple, and so much better faster.
At Bista Solutions our Job is to understand your business & provide the best solution. We are the best Odoo implementation partner in North America. We have 350+ Odoo implementations across several industries.


