

A simple step by step guide to Odoo Subscription App

Odoo Subscription App: Overview
Odoo Subscription app has made recurring billing also subscriber management easy. Not only can your team focus on selling great services, but the app’s features are also simple and the settings are customizable – which allows for automated management (i.e. clear contracts, automated invoices, etc.) – alleviating any stress you may normally experience without this implementation.
The Odoo subscription is easy to use. Odoo subscription app has an easy & also quick sign-up process. The Portal is very user-friendly.
Beyond all its benefits, this app allows your business to save time on routine tasks and instead focus on growing revenue – which translates to a more efficient sales force. Furthermore, the Odoo Subscription app has excellent analysis tools in order to optimize your business (i.e. sales performance, built-in revenue analytics, future business projections, etc.).
Let’s dive deeper into the Odoo Subscription app: what it is also how it works.
Odoo Subscription Template
Upon opening the Odoo Subscription app, the first thing you will notice is the pipeline of your subscriptions.
To access the Subscription template: go to the top menu, click on Configuration, and also select Subscription Template
In Odoo Subscription Template, you are going to define on which basis you are going to charge your customer. You can create a new Subscription Template by triggering the Create button on the top.
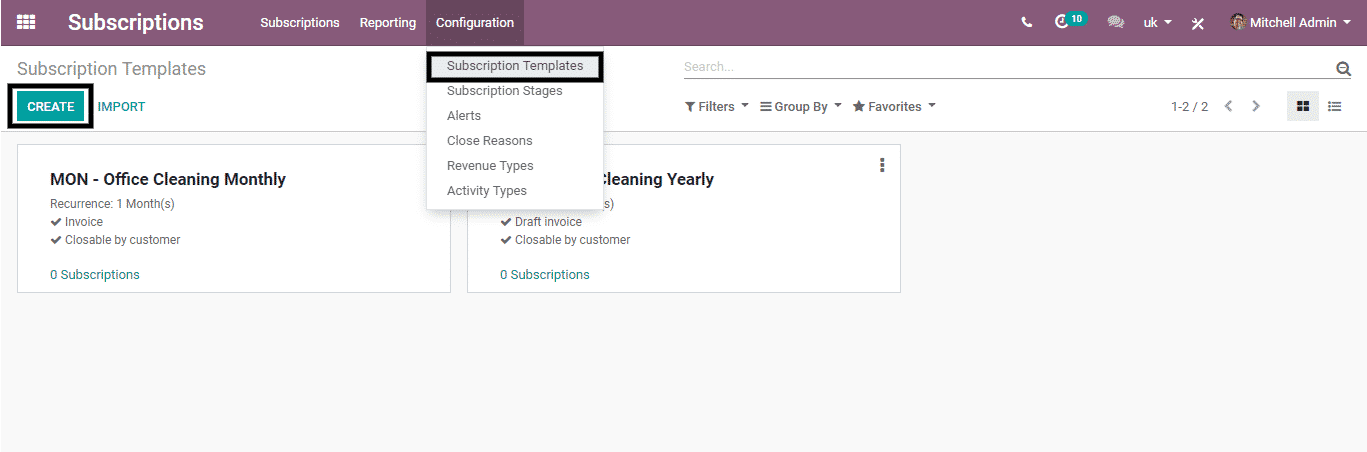
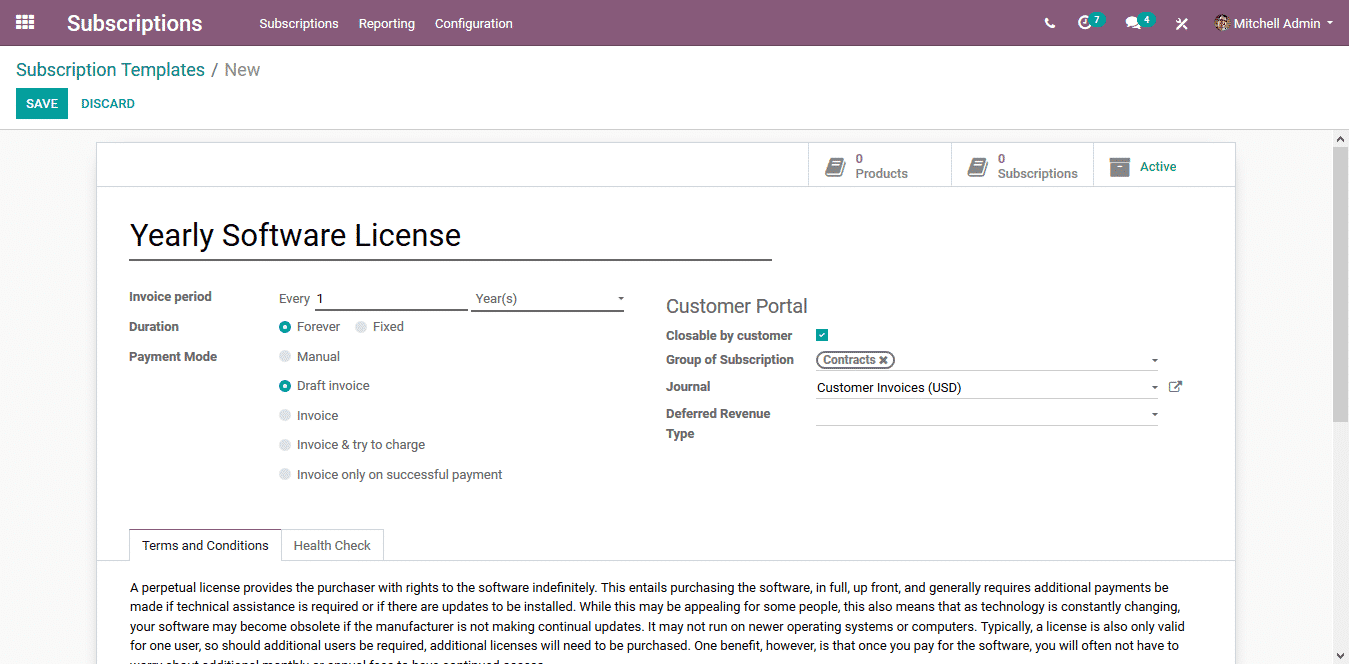
On creating a new subscription template a new form view opens (as seen in the screenshot below). Here you will simply have to fill in the basic details asked of you. How you fill out the information will depend on your organization and its details.
We are explaining the meaning behind each term used in Odoo subscription.
- Invoice period: Here you can specify the duration for which your invoice should be generated.
- Duration: This translates to the length of time. In this instance, it is categorized into two options – Forever and Fixed.
- Forever Option: This implies that there won’t be any end date for your subscription.
- Fixed Option: This implies that there is an end date for your subscription. On passing the subscription date, it automatically ends.
- Payment Mode: Here you can define how you want your invoice to be issued. There are many options provided, such as; Manual, Draft Invoice, Invoice, Invoice & Try to Charge, as well as Invoice Only on Successful Payment.
- Customer Portal: Under this you have the following options:
- Closable by Customer – this gives your customers the right to close their subscription whenever they want.
- Group of Subscription – this allows you tag a specific group (which you can create) pertaining to this template.
- Journal – this can help you set-up journal entries for accounting purposes where all the entries of the template will be invoiced in the specified journal.
- Deferred Revenue Type: This allows you to set the asset category for your subscription inside Odoo subscription app.
Once all the fields have been filled out, you can save the subscription template by clicking on the Save button on the top.
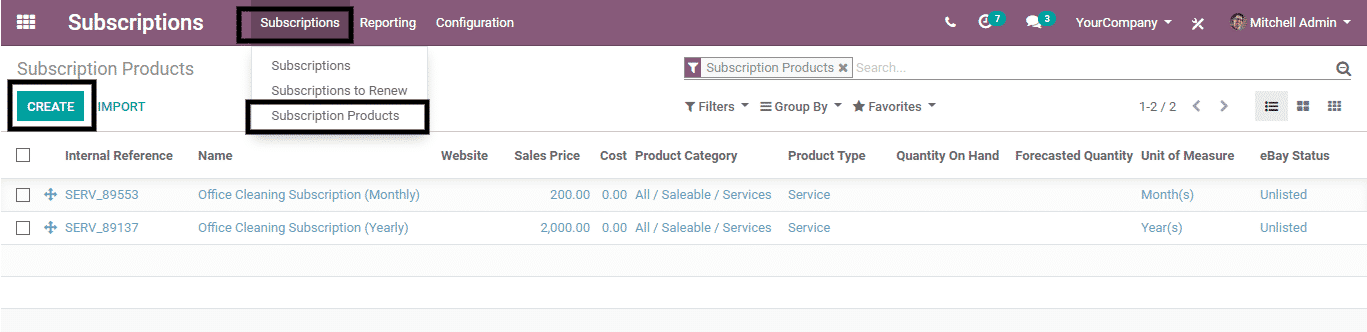
Now, let’s proceed. Go to the top menu and click on Subscription, and select Subscription Products from the drop-down menu (as seen in the screenshot below).
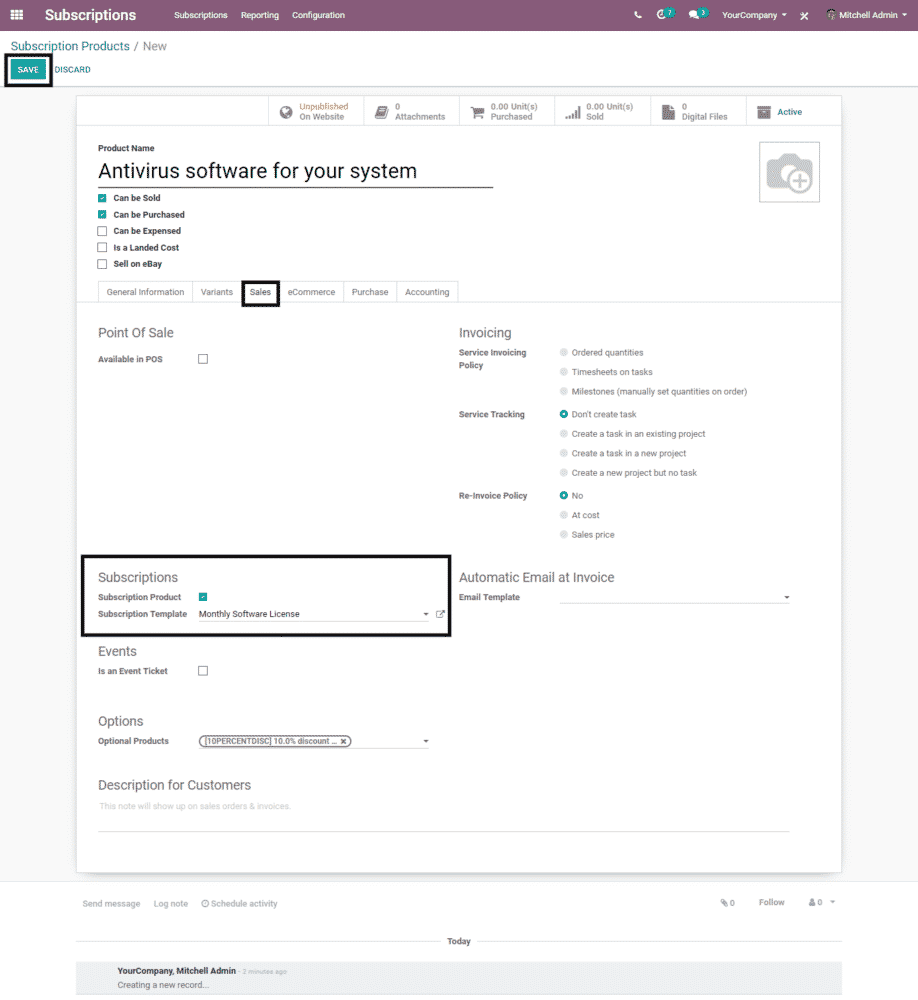
In the Subscription Product, you will be able to see all the products you are currently selling to your customer on display. You can create your own Subscription Product by triggering the Create button
On creating a Subscription Product, you require to fill out all the basic details requested of you. Then click on the Subscription section under the Sales tab, where you will find Subscription Product – this has to be enabled so that whenever you confirm the sales order with the pertaining product, a subscription is automatically created.
An Odoo subscription Template is where you can select the template according to your organization’s details/preferences. In this instance, we have selected the template which we have created – as seen in the screenshot above.
Again – once you fill out all the details, you can save it by clicking on the Save button at the top.
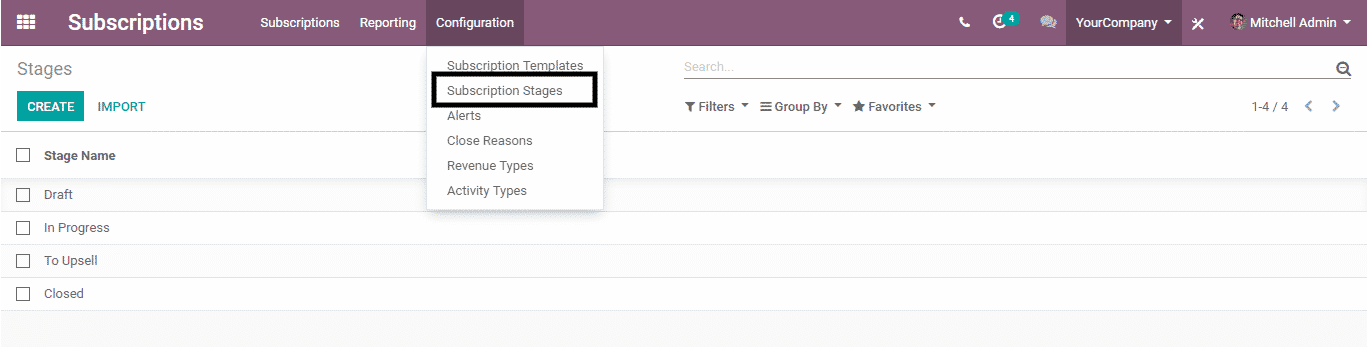
Now, click on Configuration at the top and select Subscription Stages. This is where you can configure the stages for your subscription so it becomes easy for you to determine the state of your subscription.
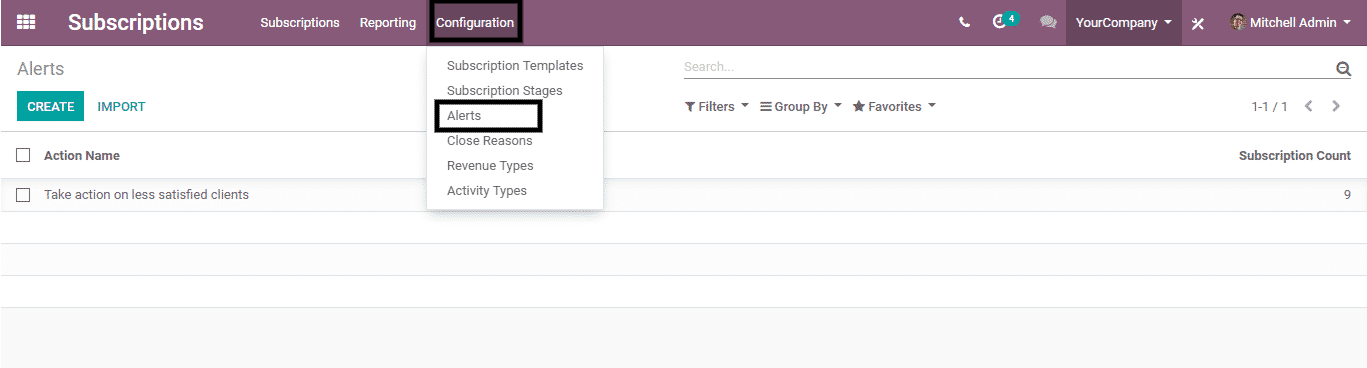
Next, click on Configuration at the top and select Alert. Here you will be able to create alerts for your subscriptions. (in case there is churring of accounts or a modification in billing).
Next, click on Configuration at the top and select Close Reasons. In this section, you can keep track of the reason behind your subscription ending. And why you may be losing your customers.

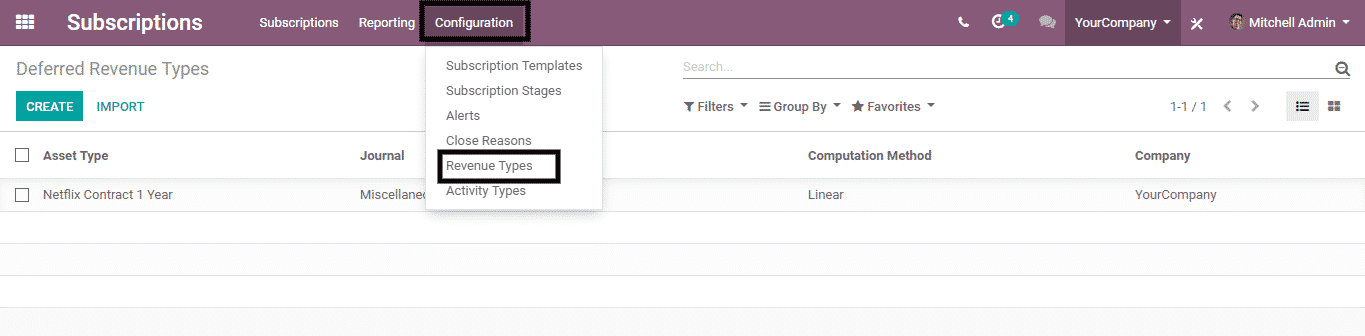
If you click on Configuration and select Revenue Types, you can configure your deferred revenue types. This is required if you are selling your subscription for an annual service or membership – and especially, if you want to follow GAAP compliance.
Deferred Revenue refers to the revenue that has not yet been earned.
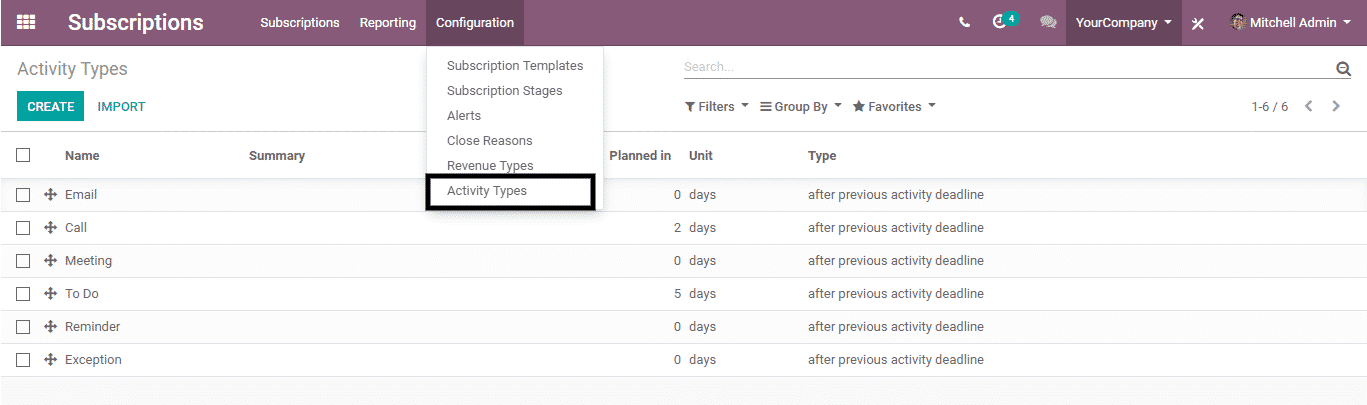
By clicking on Configuration and then selecting Activity Types, you can set-up the activities (i.e. Email, Call, Meeting, Reminders, etc.) which you may need in order to further communicate with your customers.
Subscription through Sales Order
To create a subscription through a Sales order, you need to go to the Sales Management app and make a new quotation by clicking on the CREATE button. For more details about Odoo Sales Management, please refer to our step by step guide on Odoo Sales Management App
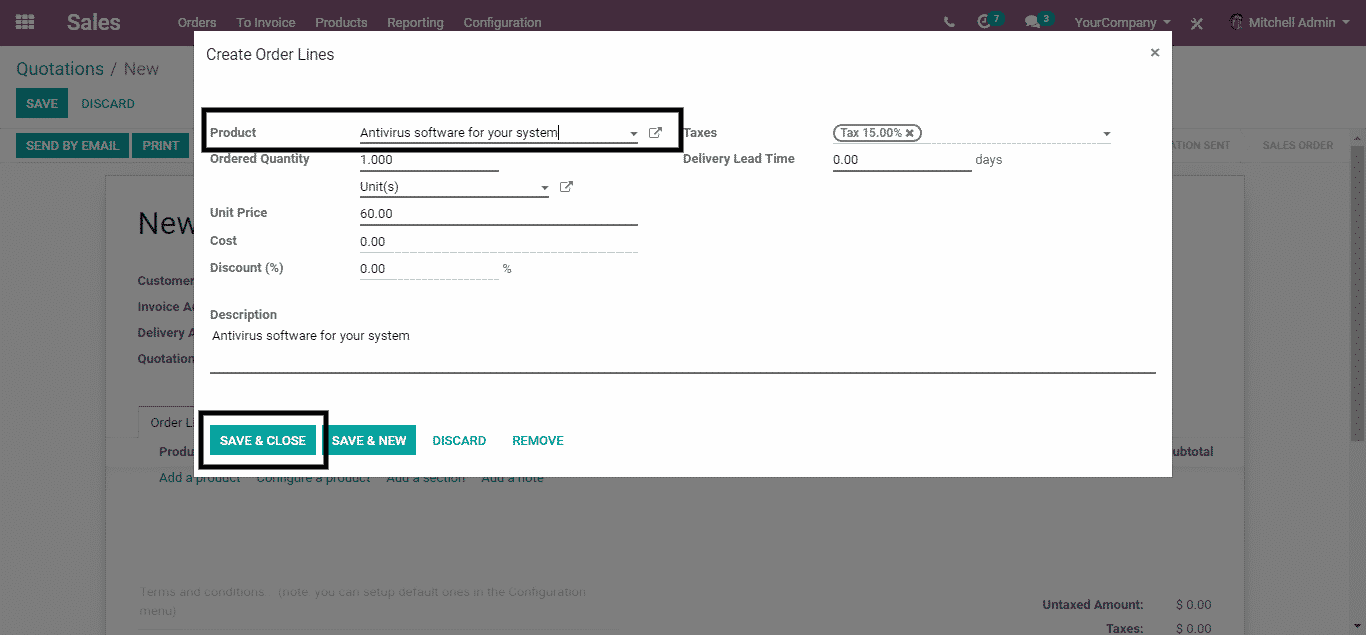
In the orderline, you can add your subscription products and save your Quotation.
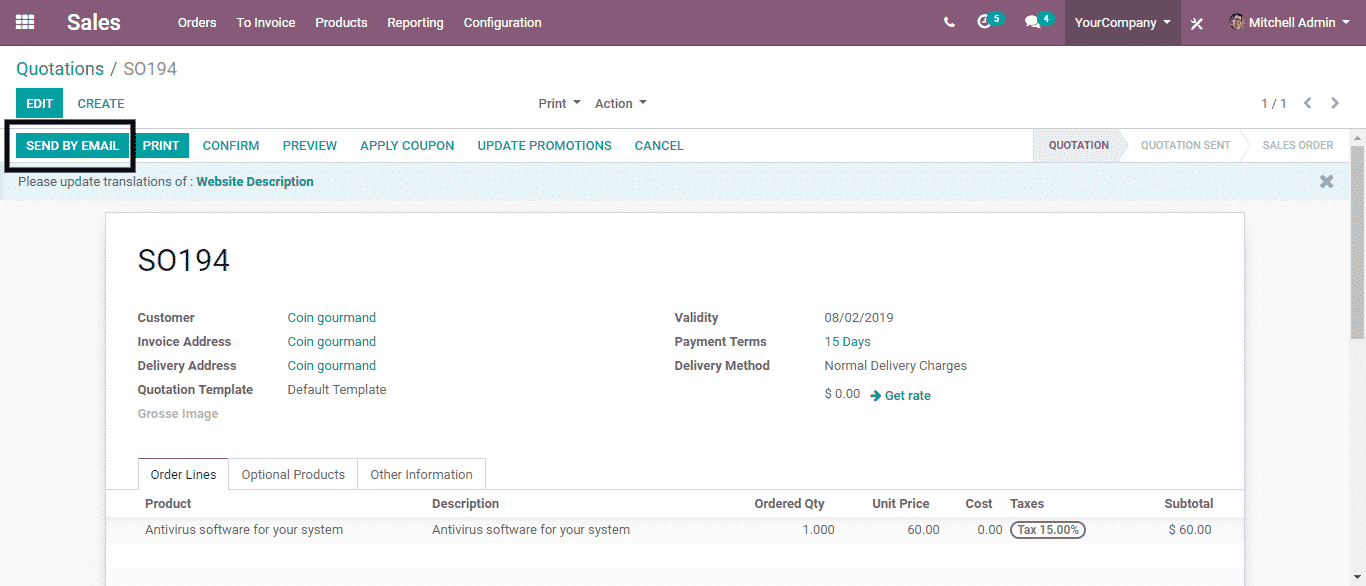
By triggering SEND BY EMAIL, you can send that quotation to your customer via email.
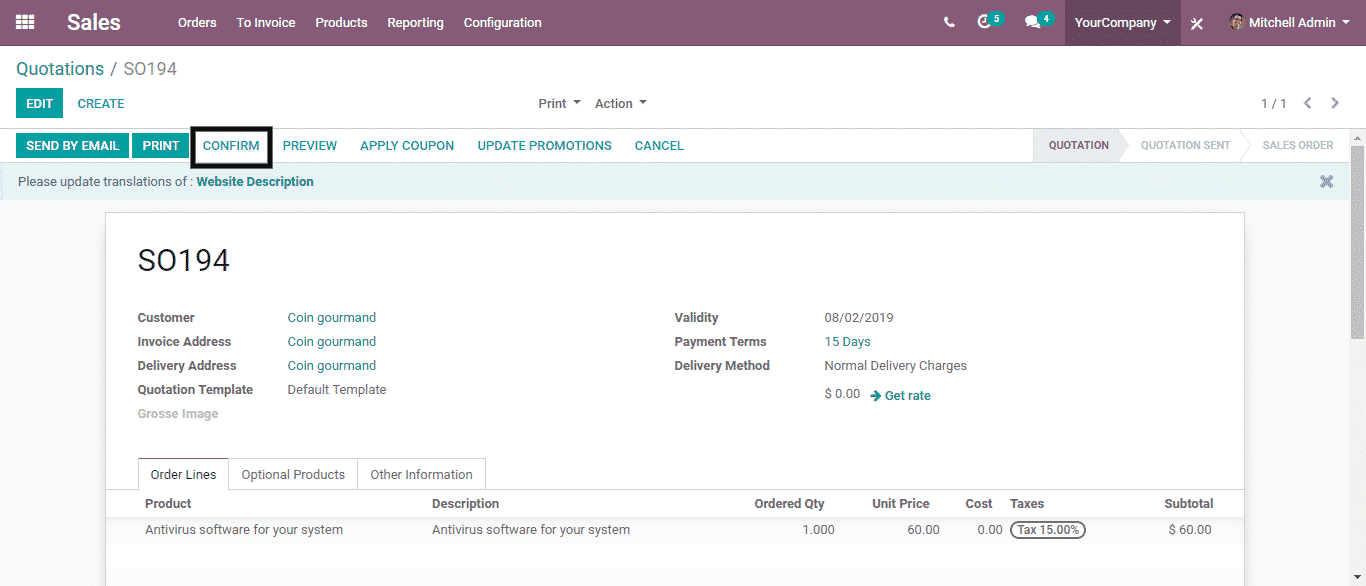
Once the customer has accepted the quotation, you can go ahead and trigger the CONFIRM button and covert the RFQ into the Sales Order.
Once you Confirm the sales order, you can see the smart tab where Subscriptions has been updated in the form view. This is because the Sale Order contains Subscription products and it links the sales order with the subscription.
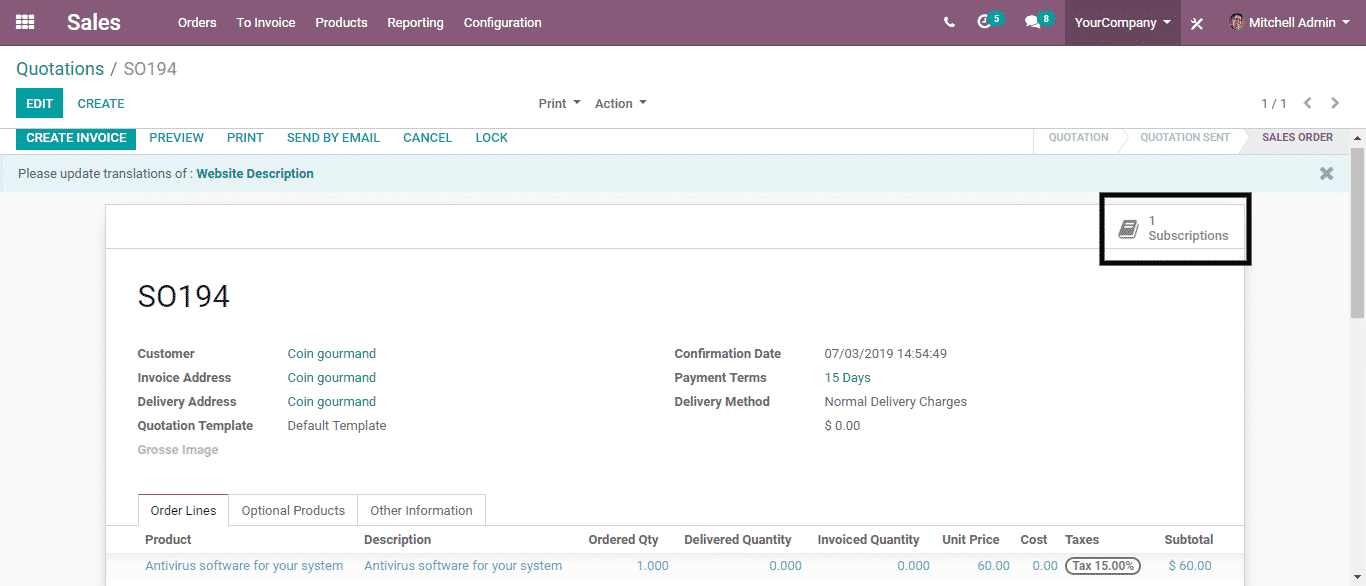
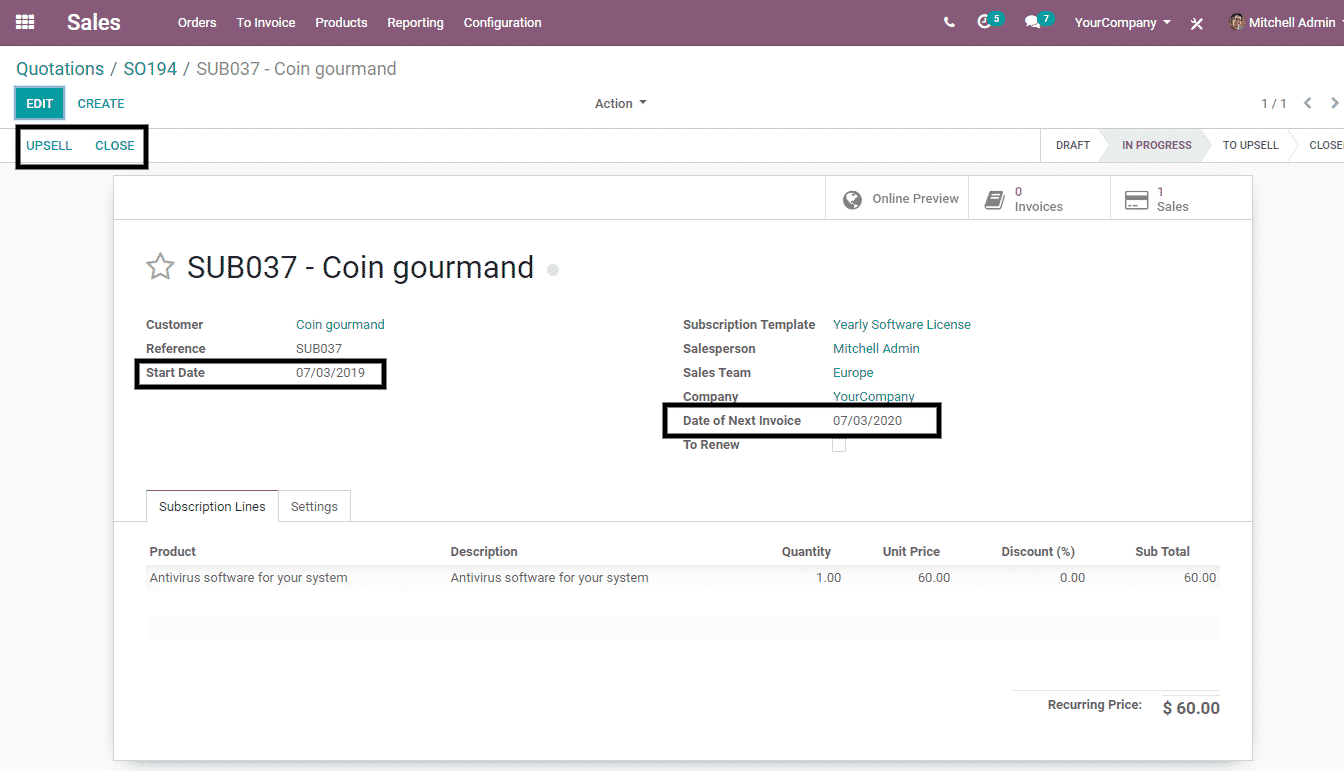
On clicking the subscription smart tab, it will redirect to the details of your subscription. Since it is a yearly subscription you can see the Start Date and the Date of Next Invoice that has a duration of a year. Then you have the UPSELL and CLOSE option at the top.
Upselling Your Odoo Subscription
If your customer demands an additional feature or product with the subscription, you can upsell your Subscription by clicking on the UPSELL button; which will open a wizard.
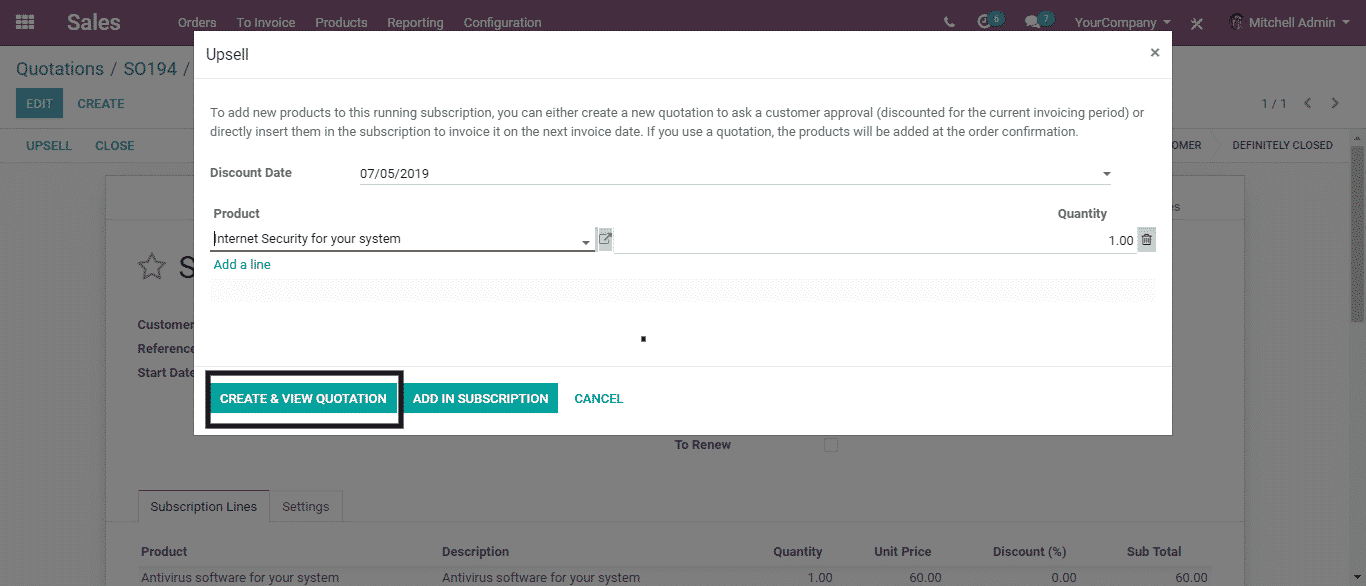
In the wizard you can add the upselling products and click CREATE & VIEW QUOTATION which will create another sales order for the upselling product. You can then send it to the client for approval.
If you select ADD IN SUBSCRIPTION, it will add the upselling product in your current subscription and directly generate an invoice for the customer.
Closing Your Subscription
Again going back to the subscription, you have the CLOSE option at the top.
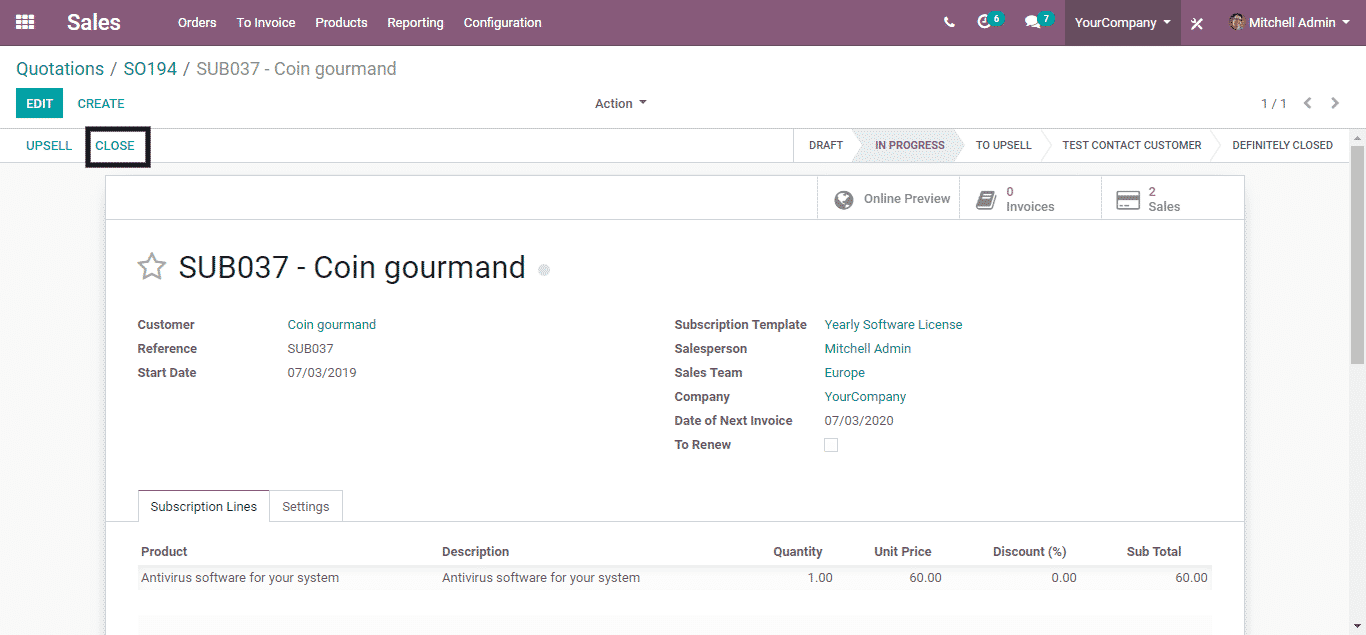
If you wish to close the subscription you can click on the CLOSE button which will open a wizard. Once it’s open, you can view all the ‘closing reasons’ which you have configured. You can even configure a new reason at the same time by clicking on the Create and also Edit option. Submit the reason by clicking on the SUBMIT button inside the Odoo Subscription template.
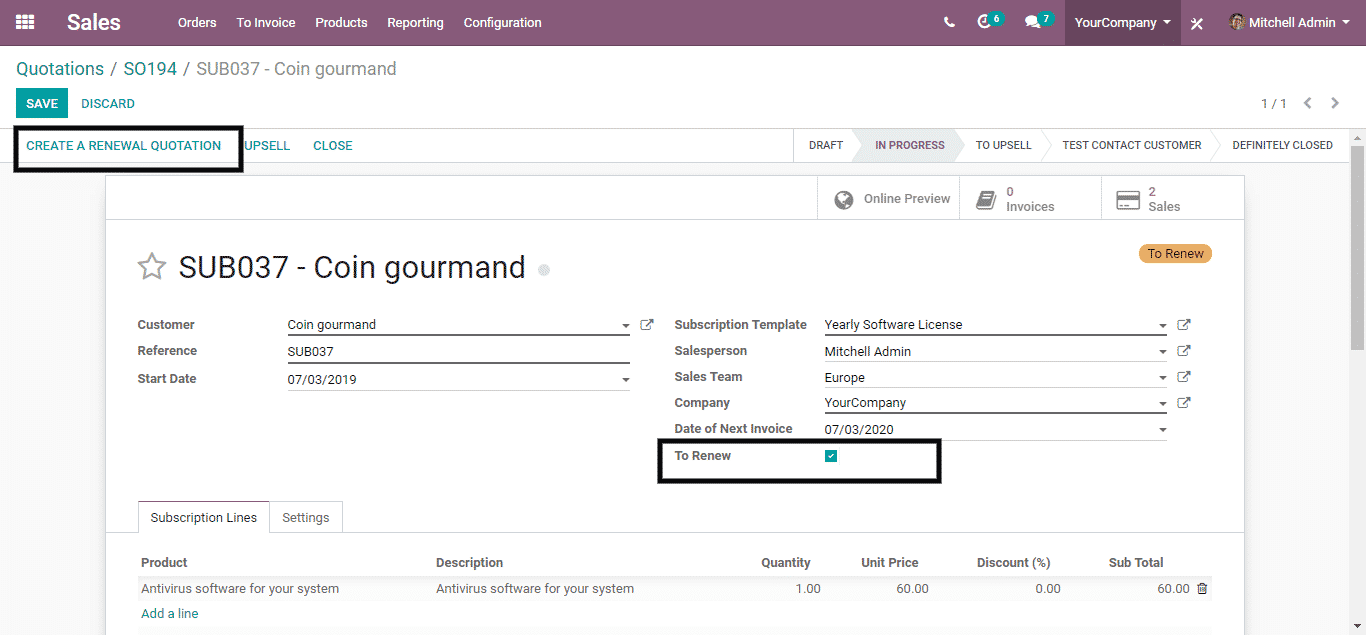
Renew
In your subscription, there is a To Renew field. Enabling this field will present you with an option to CREATE A RENEWAL QUOTATION. So when the subscription period is over. By clicking on that option, you can create a renewal quotation for your customer.
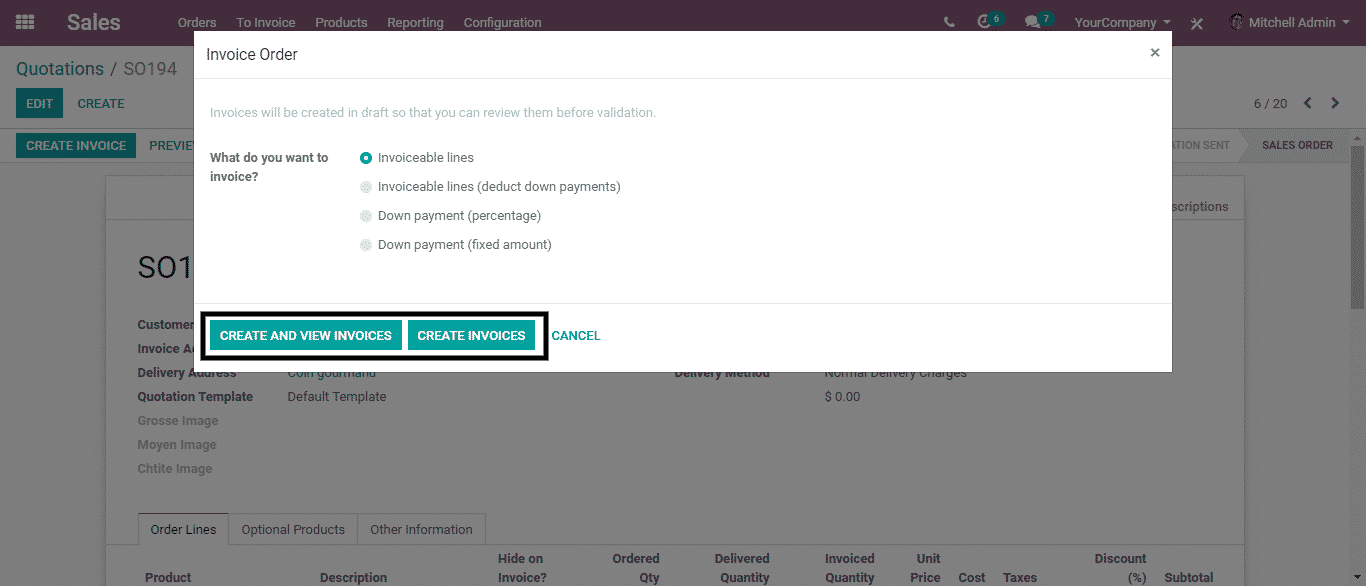
Now you can generate an invoice for your subscription by clicking on the CREATE INVOICE button.
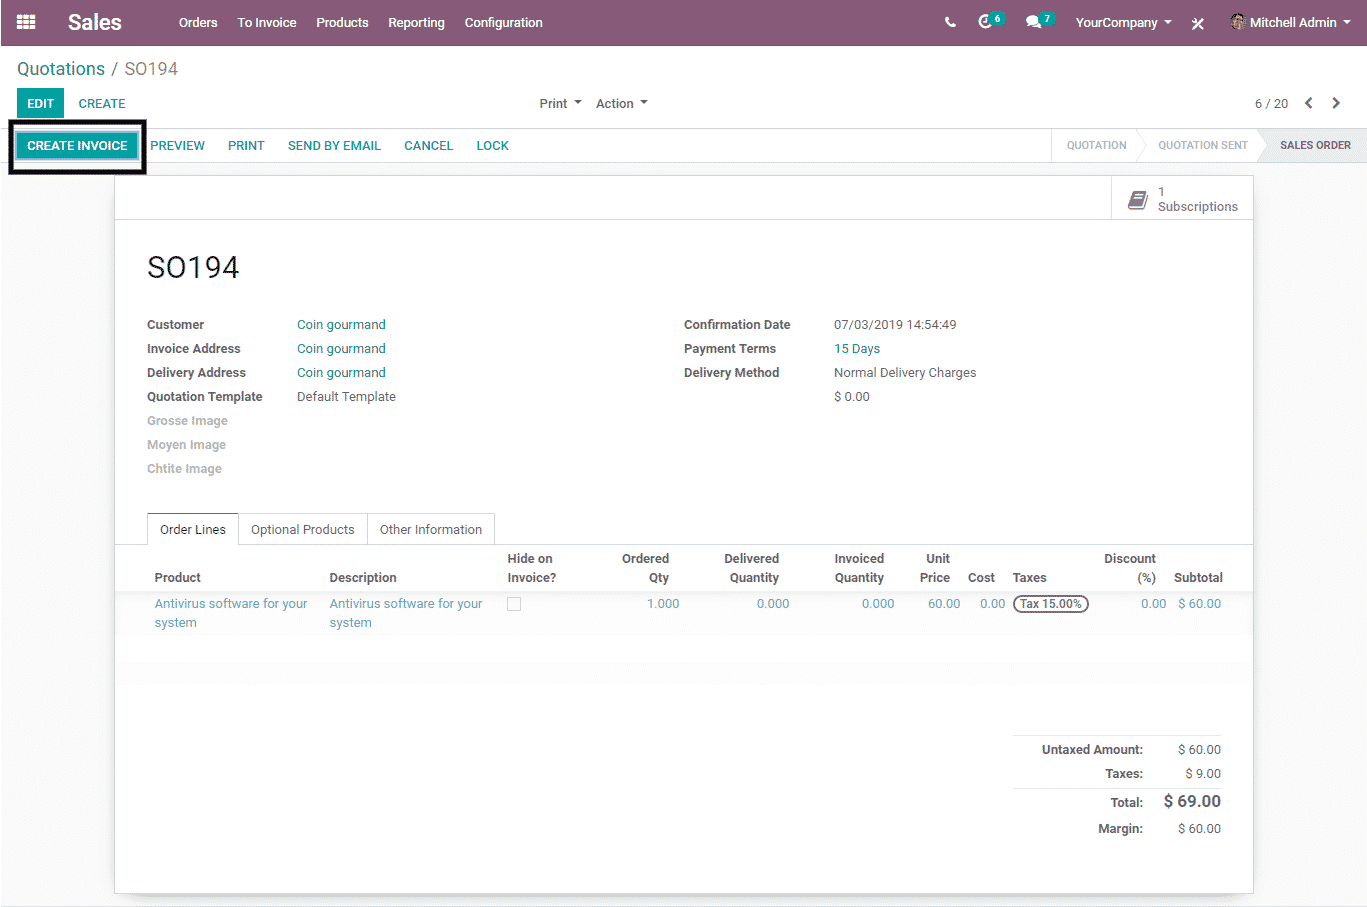
For more detailed information of Invoice flow in the Sales Order, refer to our guide on the Sales Management App.
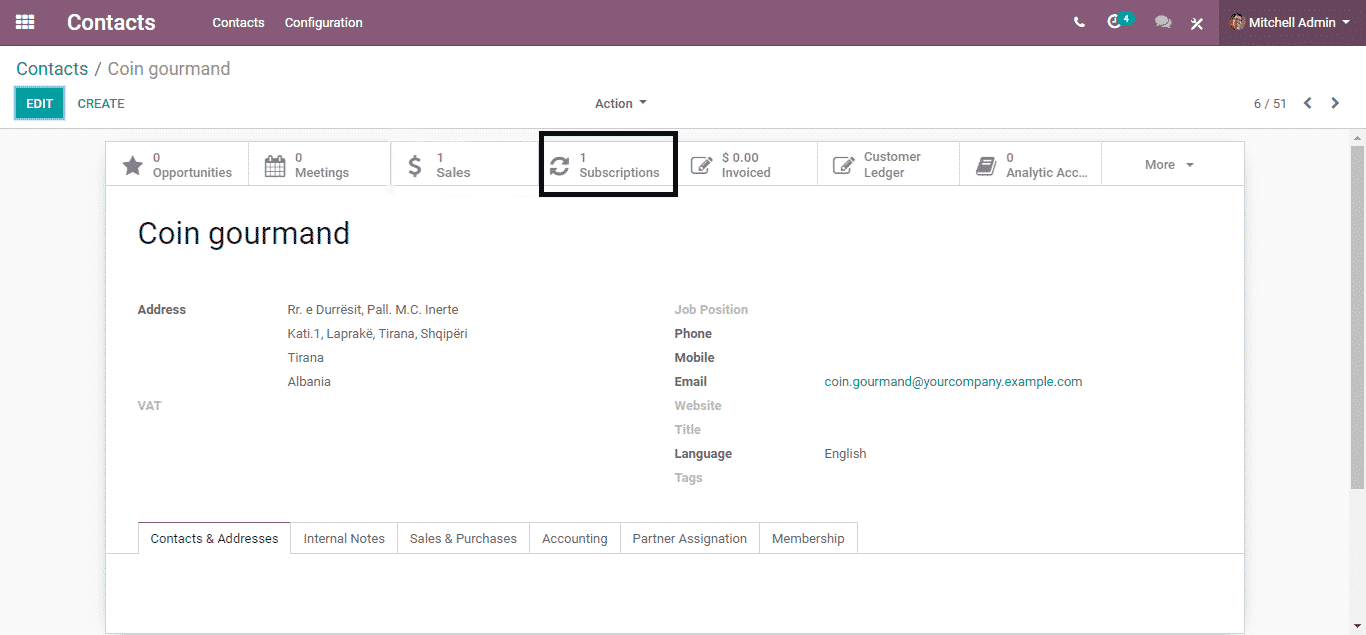
Contacts
When you open your customer’s contact information in the Contact module, you will see that your customer’s contact is linked with your subscription.
Reporting
You can analyze the subscription or business process efficiency with reporting.
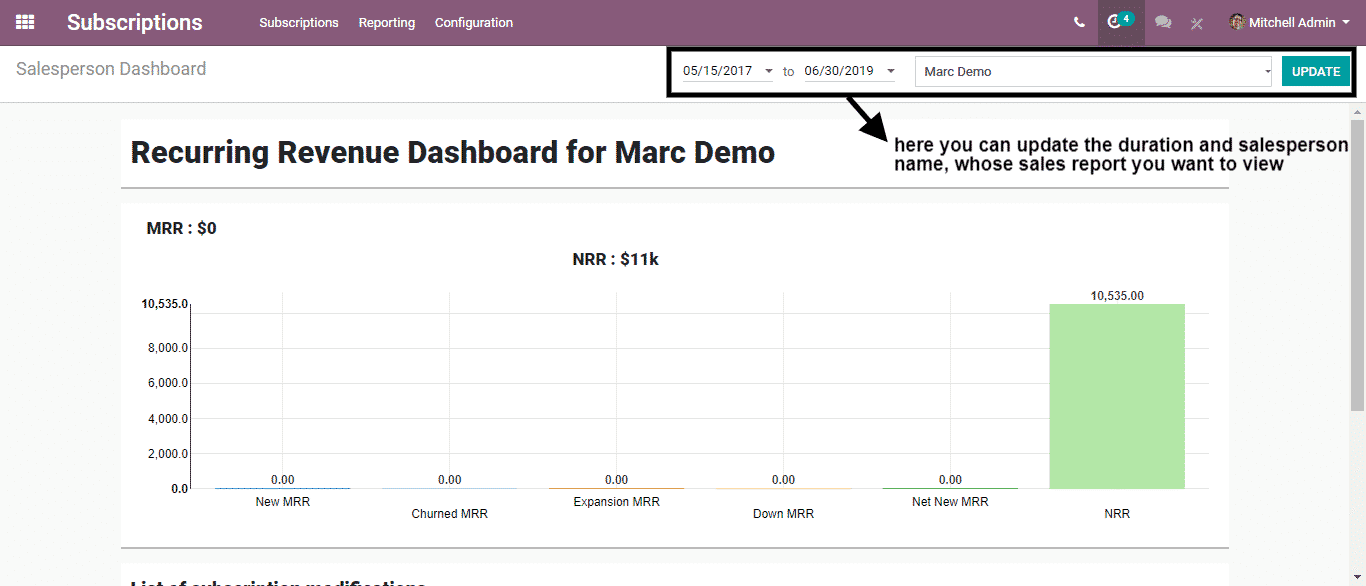
Salesperson Dashboard
On the top menu click on Reporting and select the Salesperson Dashboard option from the drop-down menu. This is where you can view all the sales you have done at different times.
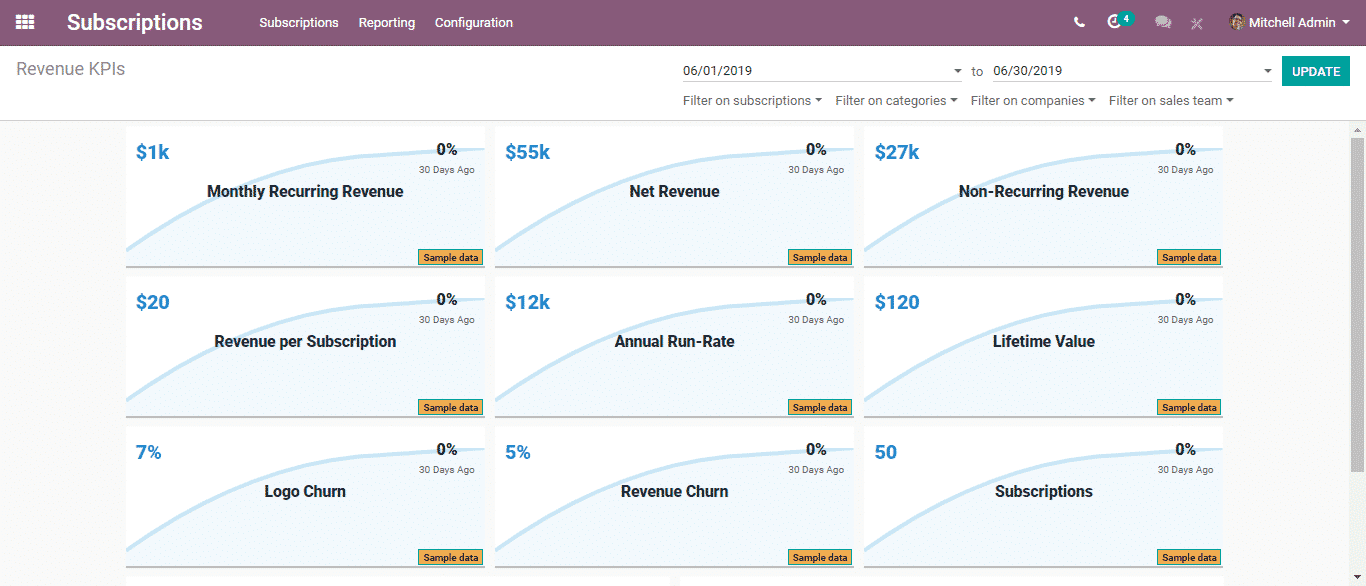
Revenue KPI
If you click on Reporting and thus select Revenue KPI from the drop-down, you’ll see that this option has the revenue KPI dashboard. Here you can access all the revenue related to your Subscription.
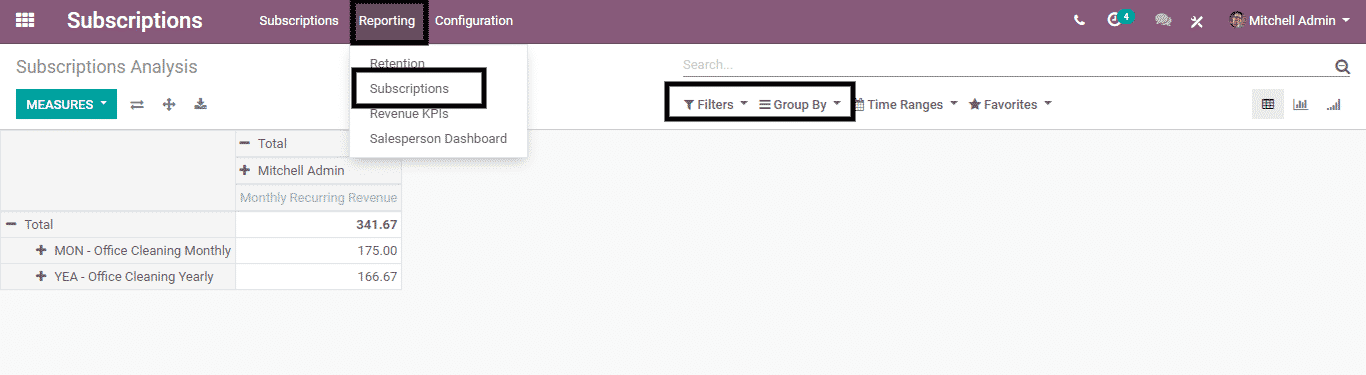
Subscription Reporting
By selecting Reporting and then clicking on Subscription from the drop-down, you can view the on-goings of your subscription. You can also group and filter by different parameters, and also use different Measures, and views.
Retention Analysis
If you click on Reporting and select Retention from the drop you, you will gain access to all the subscriptions that were open in a specified time period.

While there are several benefits to the Odoo Subscription App. There are also some instances when the default Odoo Subscription App or module does not fulfill the requirements of a company. In such situations, an experienced Odoo implementation partner like Bista Solutions can customize the modules as per your business requirement.
Bista Solutions is an Odoo Gold Partner across North America and has been nominated for Odoo Best Partner in 2017 and 2021 – and has won the award in 2015, 2016 and 2018. Rest assured the team of experienced and skilled developers know what they are doing. And will be able to help you. If you need assistance or customization for your Odoo Apps you can schedule a demo with us using this Contact Form or by emailing us at sales@bistasolutions.com.


